Next.js Multi-Tenant Starter Application

In this guide, we’ll build an example B2B application in Next.js where users can sign up, login, manage their accounts, and view organization and member information, all using PropelAuth and NextJS.
We're going to use the following technologies for walkthrough:
- Next.js - for our frontend and backend (with API routes)
- PropelAuth - for user login and management
The full code of the walkthrough will be available on this Github repo.
Setting Up Authentication Pages
Before creating our application, we'll first be setting up our project in PropelAuth. Projects in PropelAuth provide all of the necessary components of authentication for your applications, including hosted login pages, which we'll be using for this walkthrough. You can also set up additional features such as SAML, social logins/SSO, and more. For more information on how to add these options, be sure to check out our documentation.
The first step is to create a project in PropelAuth.
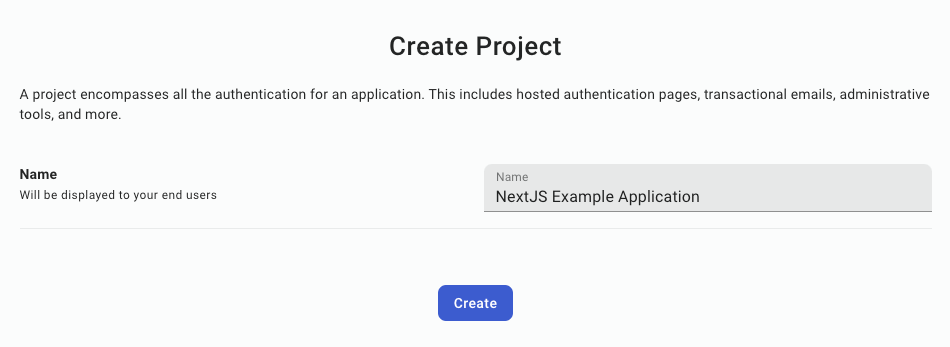
Once a project has been created, you will be directed to the dashboard for your project, outlining the steps to complete adding authentication into your application.
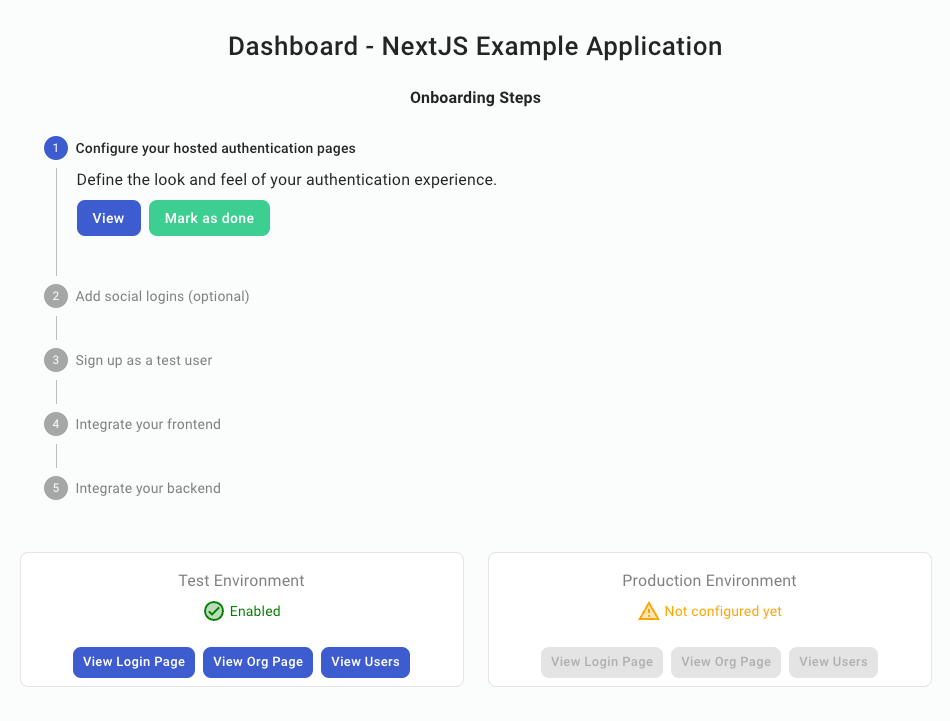
The first step is to customize the look of your hosted authentication pages. By clicking "View," you are redirected to this page:
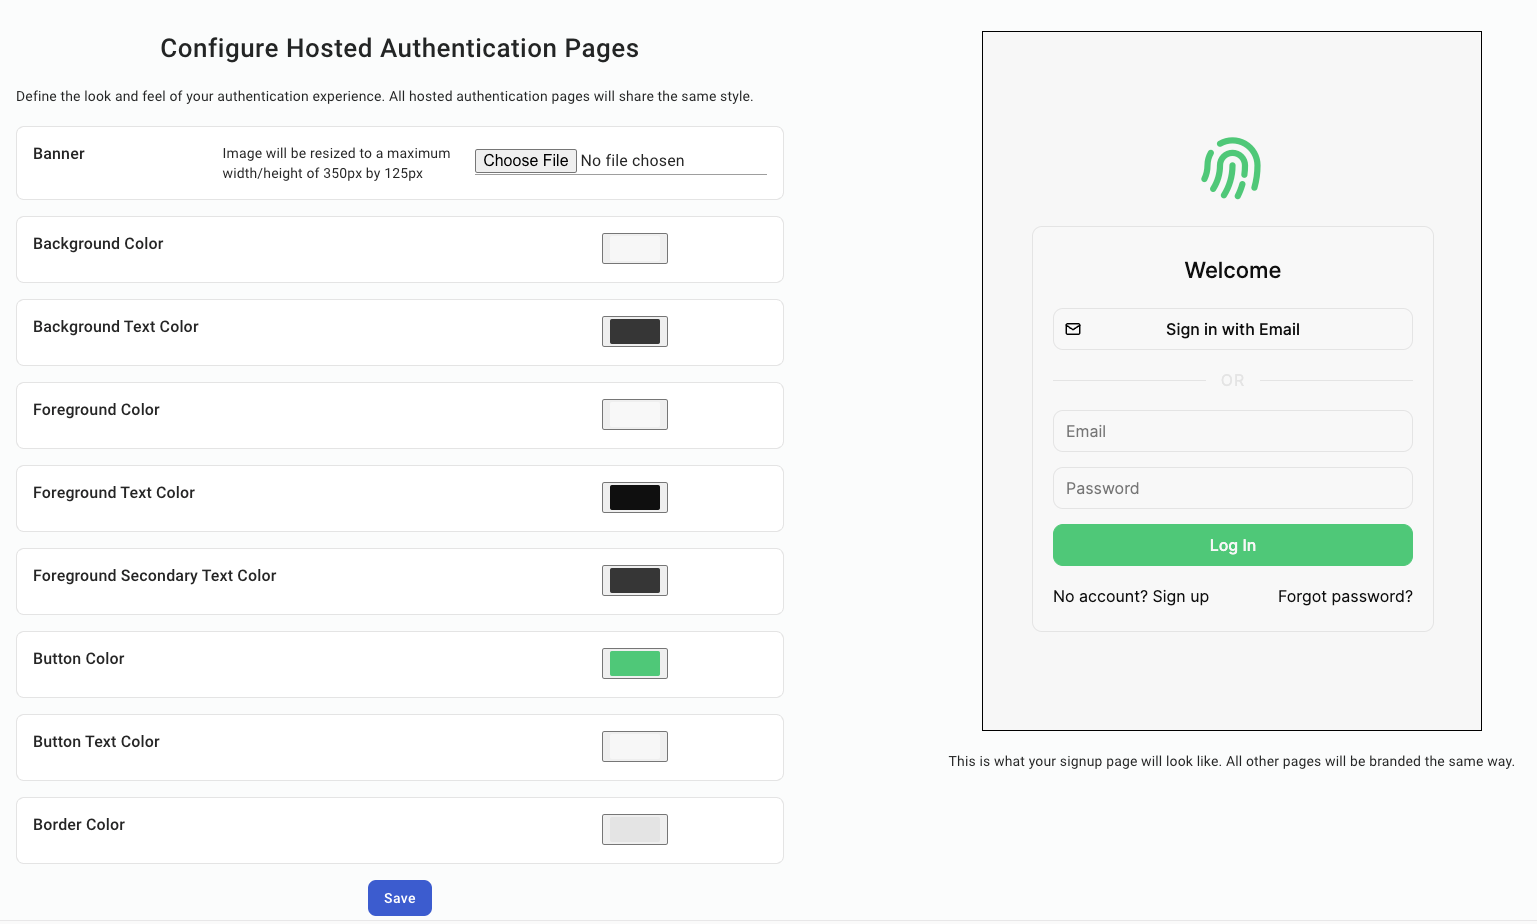
Here you can adjust the look of all hosted authentication pages to best match your preferred branding and style guidelines. Feel free to make any changes, click "Save," and navigate back to the dashboard using the left sidebar. Now that we've changed the look of our pages, click "Mark As Done," and move on to the next step.
From here, you can configure other aspects of your end-users auth experience, including:
- Adding "Login in with Google" or other SSO providers
- Collecting additional metadata on signup - like username or first name/last name
- Allowing your users to upload their own profile picture
- Letting your end-users create organizations and invite their coworkers (called B2B support)
For now, we are going to click "Mark As Done" on step 2, "Add Social Logins," and move on to step 3.
Sign Up As A Test User
Under step 3, click "View," and a new tab should open with the authentication page you configured above. Sign up as if you are a user, exit the tab, and mark the step as done.
Create NextJS Project
If you don't have a project already, you can create one with:
$ npx create-next-app@latestNext, install the @propelauth/react package. It provides an easy interface to access your users information. It will manage auth tokens for you and has nice features like refreshing auth information when the user reconnects to the internet or switches back to your tab.
$ npm install @propelauth/reactFrontend
In this section, we will be setting up the frontend sections of our NextJS application, walking through how to integrate PropelAuth into your components as we go.
Set Up Auth Provider
First, navigate to the _app.js file in your application. Here we are going to add our AuthProvider.
import { AuthProvider } from '@propelauth/react';

export default function App({ Component, pageProps }) {
  return <AuthProvider authUrl={process.env.NEXT_PUBLIC_AUTH_URL}>
    <Component {...pageProps} />
  </AuthProvider>
}
The authUrl is available on the Frontend Integration section of your PropelAuth project, or step 4 in your dashboard.
AuthProvider is the provider of a React context that manages the current user’s access token and metadata. You cannot use the other hooks without it. AuthProvider manages authentication information and all other components pull information from it. We are placing it at the top level of our application so that it never unmounts.
Get Logged In Status
Next, in the index.js file, we'll bring in the withAuthInfo function, which injects a user's information into a React component. In our project, we will be displaying different components depending on whether or not the user is logged in.
import {withAuthInfo} from "@propelauth/react";

const Guide = withAuthInfo(({isLoggedIn}) => {
    if (isLoggedIn) {
        return <div>
            The User is logged in
        </div>
    } else {
        return <div>
            The User is logged out
        </div>
    }
})

export default Guide;
Using the code above, if a user is logged in they will see the following page:

Create Sign In/Out Buttons
@propelauth/react also provides React hooks for redirecting your users to the hosted login/signup/account pages you created in your PropelAuth project, or logging your users out. Let's add them to our index.js file.
import {useLogoutFunction, useRedirectFunctions, withAuthInfo} from "@propelauth/react";

export default function Guide = withAuthInfo(({isLoggedIn}) => {
    const logoutFn = useLogoutFunction()
    const {redirectToSignupPage, redirectToLoginPage} = useRedirectFunctions();

    if (isLoggedIn) {
        return <div>
            <p>The User is logged in</p>
            <button onClick={() => logoutFn(true)}>
                Click here to log out
            </button>
        </div>
    } else {
        return <div>
            To get started, please log in as test user.
            <br/>
            <button onClick={() => redirectToSignupPage()}>
                Sign up
            </button>
            <button onClick={() => redirectToLoginPage()}>
                Log in
            </button>
        </div>
    }
})
Now, if a user is logged out, they will see the following:

And if they are logged in, they will see:

Display User Information
Next, we'll be taking advantage of the routing capabilities of NextJS, and further using PropelAuth functions to add authentication features to our application.
First, we are going to import Link from NextJS by adding the following line to the top of our index.js file.
import Link from "next/link";Next, we are going to create a new file, called pages/display_user.jsx. In here, we are going to import and use the function withRequiredAuthInfo, which is identical to withAuthInfo but the component will not be rendered if the user is not logged in, and instead will default to redirecting to the hosted sign up page unless otherwise specified.
In this file, we'll create a new component to display user information that pulls the user object that is injected automatically from withRequiredAuthInfo. Note that we no longer need to check isLoggedIn like we did with withAuthInfo because the component only renders if you are logged in.
import {withRequiredAuthInfo} from '@propelauth/react';

function DisplayUserInformationOnFrontend({user}) {
    return <span>
        <h2>User Info</h2>
        {user.pictureUrl && <img src={user.pictureUrl} />}
        <pre>user: {JSON.stringify(user, null, 2)}</pre>
    </span>
}

export default withRequiredAuthInfo(DisplayUserInformationOnFrontend);
Finally, add the Link component to our index.js file under the logged in section, so that it looks like the following:
if (isLoggedIn) {
    return <div>
        <p>The User is logged in</p>
        <button className={styles.card} onClick={() => logoutFn(true)}>
            Click here to log out
        </button>
        <Link href="/display_user">
            Display user information in the frontend
        </Link>
    </div>
}
There should now be a button to view the user's information from the home page when they are logged in.
Sending Requests from Frontend to Backend
Up to this point, we have stayed on the frontend components of our application, but next, we will be making requests to a protected backend.
Making Authenticated Requests
To make an authenticated request on behalf of your user, you’ll need to provide an access token. Just like isLoggedIn and user, the access token is available from withAuthInfo. You provide it in the request in the Authorization header, like so:
Authorization: Bearer ACCESS_TOKENWith fetch pointed at an example endpoint, this looks like:
function fetchWhoAmI(accessToken) {
    return fetch("/api/whoami", {
        headers: {
            "Content-Type": "application/json",
            "Authorization": `Bearer ${accessToken}`
        }
    }).then(response => {
        if (response.ok) {
            return response.json()
        } else {
            return {status: response.status}
        }
    })
}
We will add this to a component in our Next.js application later, but for now, let's create protected routes.
Creating an unprotected route
Any files in pages/api are treated as a route. Let’s make a new file pages/api/whoami.js:
export default function handler(req, res) {
  res.status(200).json({ user_id: 'Not sure yet' })
}
And that’s all, we can test this route with curl
$ curl localhost:3000/api/whoami
{"user_id":"Not sure yet"}
Protecting our route
To prepare our route to receive the access token we plan on sending, we'll use PropelAuth’s Node library @propelauth/node.
npm install @propelauth/nodeWe'll create a new file lib/propelauth.js to initialize the library with our configuration loaded from environment variables. You can find these specific values in the Backend Integration section of your project, or step 5 of your dashboard.
Note: The AUTH_URL is something we need on both the frontend and the backend, so we prefix it with NEXT_PUBLIC; however, the other environment variables should not be shared with the frontend, so we do not add that prefix.
import {handleError, initBaseAuth} from "@propelauth/node";

export const propelauth = initBaseAuth({
    authUrl: process.env.NEXT_PUBLIC_AUTH_URL,
    apiKey: process.env.PROPELAUTH_API_KEY,
    manualTokenVerificationMetadata: {
        verifierKey: process.env.PROPELAUTH_VERIFIER_KEY,
        issuer: process.env.NEXT_PUBLIC_AUTH_URL,
    }
});

export async function validateUser(req, res) {
    try {
        return await propelauth.validateAccessTokenAndGetUser(req.headers.authorization)
    } catch (e) {
        let err = handleError(e, {logError: true, returnDetailedErrorToUser: false})
        res.status(err.status).send(err.message)
    }
}

export async function validateUserIsInOrgByPathParam(req, res) {
    try {
        return await propelauth.validateAccessTokenAndGetUserWithOrgInfo(
            req.headers.authorization,
            {orgId: req.query.orgId}
        )
    } catch (e) {
        let err = handleError(e, {logError: true, returnDetailedErrorToUser: false})
        res.status(err.status).send(err.message)
    }
}
This file exports the propelauth object, which can be used to make API calls to PropelAuth, as well as a set of helper functions for use to use in our routes.
- validateUser will check that the authorization header is formatted correctly, and will then verify that the access token is valid, determine which user it is for, and return that user. If the token is invalid or missing, it will return a 401 Unauthorized response.
- validateUserIsInOrgByPathParam is a function that checks that the authorization header is formatted correctly. It will then verify the access token is valid and determine which user it is for. Finally, it will check that the user is in an organization based on its ID which is passed in as a path parameter. If the token is invalid or missing, a 401 Unauthorized response is returned to the user. If the user isn't in the specified organization, a 403 Forbidden response is returned to the user. We will use this function in the final section of our build.
- We created these specific functions based on how we wanted to structure our interactions between our specific frontend and backend, but feel free to structure yours differently. There are several other helpful functions on the propelauth object that can be found in our documentation.
And now we have everything we need to update our pages/api/whoami.js route:
import {validateUser} from "@/lib/propelauth"

export default async function handler(req, res) {
    const user = await validateUser(req, res)
    res.status(200).json(user)
}
Display Response
Finally, let's add a component to make the request to our protected route and display the information returned.
First, create a new file pages/authenticated_request.jsx. Next, using the fetch function we created earlier, as well as React hooks we can bring into our component, we can make the component below:
import {withRequiredAuthInfo} from "@propelauth/react";
import {useEffect, useState} from "react";

function fetchWhoAmI(accessToken) {
    return fetch("/api/whoami", {
        headers: {
            "Content-Type": "application/json",
            "Authorization": `Bearer ${accessToken}`
        }
    }).then(response => {
        if (response.ok) {
            return response.json()
        } else {
            return {status: response.status}
        }
    })
}

function AuthenticatedRequestToBackend({accessToken}) {
    const [response, setResponse] = useState(null);
    useEffect(() => {
        fetchWhoAmI(accessToken).then(setResponse)
    }, [accessToken])

    return <span>
        <h2>Server Response</h2>
        <pre>{response ? JSON.stringify(response, null, 2) : "Loading..."}</pre>
    </span>
}

export default withRequiredAuthInfo(AuthenticatedRequestToBackend);
Finally, we'll add another Link to our index.js file, which will link to our new component.
if (isLoggedIn) {
    return <div>
        <p>The User is logged in</p>
        <button className={styles.card} onClick={() => logoutFn(true)}>
            <p>Click here to log out</p>
        </button>
        <Link href="/display_user">
            <p>Display user information in the frontend</p>
        </Link>
        <Link href="/authenticated_request">
            <p>Make an authenticated request to a Next.js API route</p>
        </Link>
    </div>
}
Organization Information
A common use case for B2B applications is the ability to separate users into organizations or teams. For the purposes of this application build, we will add functionality to view the list of organizations that the current user is a part of, and to view other members of that organization.
Display Organizations
First, we'll create a new file pages/org_demo.jsx. Into this file, we'll be importing withRequiredAuthInfo and useRedirectFunctions from @propelauth/react. Next, we'll be passing in the orgHelper object into our function, since it contains several helpful functions to manage organizations in PropelAuth, including the getOrgs function which returns the list of organizations the current user is a member of.
Finally, we will map over that returned list of orgs and for each one create a Link to another path and file that we will create shortly. The resulting code looks like this:
import {withRequiredAuthInfo, useRedirectFunctions} from '@propelauth/react';
import Link from 'next/link'

// orgHelper is automatically injected from withRequiredAuthInfo
function OrgSelector({orgHelper}) {
    const {redirectToCreateOrgPage} = useRedirectFunctions()

    return <div>
        {orgHelper.getOrgs().map(org => {
            return <span key={org.orgId}>
                <Link href={`/org/${org.orgId}`}>
                    <button>See members of <b>{org.orgName}</b></button>
                </Link><br/>
            </span>
        })}
        <button onClick={redirectToCreateOrgPage}>Create/Join Organization</button>
    </div>
}

export default withRequiredAuthInfo(OrgSelector);
Next, we are going to create the NextJS route we will use to validate and return a response. First, we'll create a api/org/[orgId].js using the helper functions we created in lib/propelauth.js
import {propelauth, validateUserIsInOrgByPathParam} from "../../../lib/propelauth"

export default async function handler(req, res) {
    const {user, orgMemberInfo} = await validateUserIsInOrgByPathParam(req, res)
    const orgUsers = await propelauth.fetchUsersInOrg({orgId: orgMemberInfo.orgId})
    res.status(200).json({user, orgMemberInfo, orgUsers: orgUsers})
}
Finally, we will create the page that contains the requested information from our protected route we just created. First, create pages/org/[orgId].js. Next, we are going to create a fetch function similar to the one we created earlier, this time pointing to the route we just created:
function fetchOrgInfo(orgId, accessToken) {
    return fetch(`/api/org/${orgId}`, {
        headers: {
            "Content-Type": "application/json",
            "Authorization": `Bearer ${accessToken}`
        }
    }).then(response => {
        if (response.ok) {
            return response.json()
        } else {
            return {status: response.status}
        }
    })
}
We will use this to display information about the organization and the user's role within the organization, as well as a list of other users in the organization.
import {useRouter} from "next/router";
import {withAuthInfo, useRedirectFunctions} from "@propelauth/react";
import {useEffect, useState} from "react";

function fetchOrgInfo(orgId, accessToken) {
    return fetch(`/api/org/${orgId}`, {
        headers: {
            "Content-Type": "application/json",
            "Authorization": `Bearer ${accessToken}`
        }
    }).then(response => {
        if (response.ok) {
            return response.json()
        } else {
            return {status: response.status}
        }
    })
}

const Org = ({orgHelper, accessToken}) => {
    const {redirectToOrgPage} = useRedirectFunctions()

    // Get the orgId from the path and check that the user is in it
    const router = useRouter();
    const {orgId} = router.query;
    const org = orgHelper.getOrg(orgId)

    // Fetch org members from API route
    const [response, setResponse] = useState(null)
    useEffect(() => {
        fetchOrgInfo(org.orgId, accessToken).then(setResponse)
    }, [org.orgId, accessToken])

    // Display not found if user isn't in that org
    if (!org) {
        return <div>Not Found</div>
    }

    // Display org's name, user's role, and other members (fetch from the API)
    return <div>
        <h3>Org: {org.orgName}</h3>
        <h4>Your role: {org.userAssignedRole}</h4>
        <p>{response ? "" : "Loading..."}</p>
        <h4>List of Organization members</h4>
        <ul>
            {response ? response.orgUsers.users.map(user => {
                return <li key={user.userId}>
                    <p>{user.email}</p>
                </li>
            }) : 'Loading...'}
        </ul>
        <br/>
        <button onClick={() => redirectToOrgPage(orgId)}>
            Send Invite to New Member to Organization
        </button>
    </div>

}

export default withAuthInfo(Org);
Lastly, we'll bring this functionality into our index.js file, by adding a Link that routes to our new organization pages.
  if (isLoggedIn) {
    return <div>
        <p>The User is logged in</p>
        <button onClick={() => logoutFn(true)}>
            Click here to log out
        </button>
        <Link href="/display_user">
            <p>Display user information in the frontend</p>
        </Link>
        <Link href="/authenticated_request">
            <p>Make an authenticated request to a Next.js API route</p>
        </Link>
        <Link href="/org_demo">
            <p>Create, join, and view the organization(s) you are in</p>
        </Link>
    </div>
}
Wrapping Up
This guide provides comprehensive look at an authentication application framework you can use to get started. By using PropelAuth for authentication, we were able to skip building any auth UIs, transactional emails, invitation flows, and more.
Our frontend made an authenticated request to our backend, and our backend was able to identify the user that made the request. You can use this for things like saving information in a database per user_id.
If you have any questions, please reach out at support@propelauth.com.