React Hooks for Multi-Tenancy and Authorization w/ PropelAuth

Say you built a SaaS application for restaurants to track information about their orders. There are multiple people at the restaurants who need access to this information.
There’s an owner, there are managers, and there are frontline employees who need access too.
Each of these users will have different actions they can take within your product. As an example, you probably don’t want everyone to be able to edit their restaurant’s billing information within your product.
To make matters more complicated, owners might not just own one restaurant - they could own many.
In this blog post, we’ll see how we can use PropelAuth to take care of all that boilerplate and provide the building blocks we need for authentication and authorization.
Tenant? Organization? Restaurant?
PropelAuth is an auth service designed for B2B/multi-tenant products. In other words, for products whose customers are not just individuals but teams/companies.
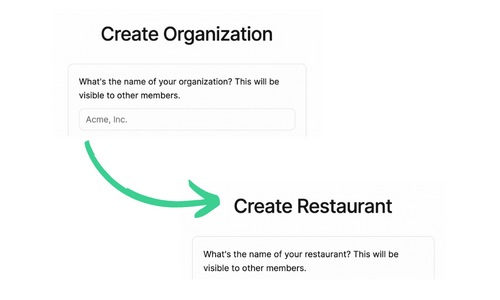
In addition to login/signup for users, PropelAuth also provides the concept of an organization, which are groups of your users that will use your product together.
For our product, since we are selling to restaurants, we can change the word “Organization” to “Restaurant” via the Organization meta-name feature:

This will update all of the UIs/components that PropelAuth provides. Since PropelAuth provides all the UIs our users need to create restaurants, invite employees to restaurants, and manage employees’ roles—we can jump right over to coding.
useActiveOrg
By default, each user can be in more than one restaurant. However, typically, we want our users to only view the information of one restaurant at a time.
There are a lot of different strategies that you can use to let your users pick which restaurant’s information they want to view. One example is a subdomain, like https://CUSTOMER.yourdomain.com. Another example is a path parameter like https://app.yourdomain.com/CUSTOMER.
PropelAuth’s React library (@propelauth/react) has a React hook called useActiveOrg which you can use to get the current active organization:
const Org = withRequiredAuthInfo(({accessHelper}) => {
    const org = useActiveOrg()
    if (!org) return <div>Not found</div>
    return <div>You are a {org.userAssignedRole} in {org.orgName}</div>
})

export default Org
But how will you know which organization is active? For that, PropelAuth also has a function getActiveOrgFn which lets you specify the active organization.
In Next.js, here’s an example where we use NextRouter to find any path parameters named orgName:
export default function App({Component, pageProps}: AppProps) {
    const router = useRouter()
    return <RequiredAuthProvider authUrl="YOUR_AUTH_URL"
                                 getActiveOrgFn={() => getOrgNameRouteParam(router)}>
        <Component {...pageProps} />
    </RequiredAuthProvider>
}

function getOrgNameRouteParam(router: NextRouter): string | null {
    const orgName = router.query.orgName
    if (typeof orgName === "string") {
        return orgName
    } else {
        return null
    }
}
Under the hood, what’s happening is the library is checking to make sure that this user is a member of that organization. If they aren’t, or if the activeOrgFn returns null, useActiveOrg will also return null.
Here’s another example where we use subdomains:
function getOrgNameSubdomain(): string | null {
    const splitLocation = window.location.host.split('.')
    // make sure it's <https://xxxxx.yyyyyy.zzz>, then grab xxxxx
    if (splitLocation.length === 3) {
        return splitLocation[0]
    } else {
        return null
    }
}
If we take our Org component above and place it in pages/restaurant/[orgId].tsx, then navigating to http://localhost:3000/org/my-restaurant will:
- Verify that our user is logged in
- Get the list of restaurants that our user is in
- Check to see if they are in
my-restaurant - If so, it’ll display
You are a {ROLE} in my-restaurant - If not, it’ll display
Not found
What are RequiredAuthProvider and withRequiredAuthInfo?
In the above examples, we used RequiredAuthProvider and withRequiredAuthInfo, but didn’t mention what they do.
RequiredAuthProvider manages our current user’s metadata and authentication information. If a user is logged in, it’ll fetch all their information and make that information available to all the other hooks, like useActiveOrg or useAuthInfo.
The reason it’s called a RequiredAuthProvider is if the user is not logged in, we automatically redirect them to a login page. This is really useful for dashboards because you never have to worry about whether or not the user is logged in.
withRequiredAuthInfo is a higher-order component that injects authentication props into your components. This lets you write really succinct components like:
const WhoAmiI = withRequiredAuthInfo((props) => {
    return <div>Hi, {props.user.firstName}!</div>
})
Roles and permissions
So far, we’ve seen that our users can view information from different restaurants that they are members of. However, like we mentioned before, each user will be able to do different things within our application.
PropelAuth has a concept of both roles and permissions that we can set for our product. For our Restaurant SaaS app, our roles are:
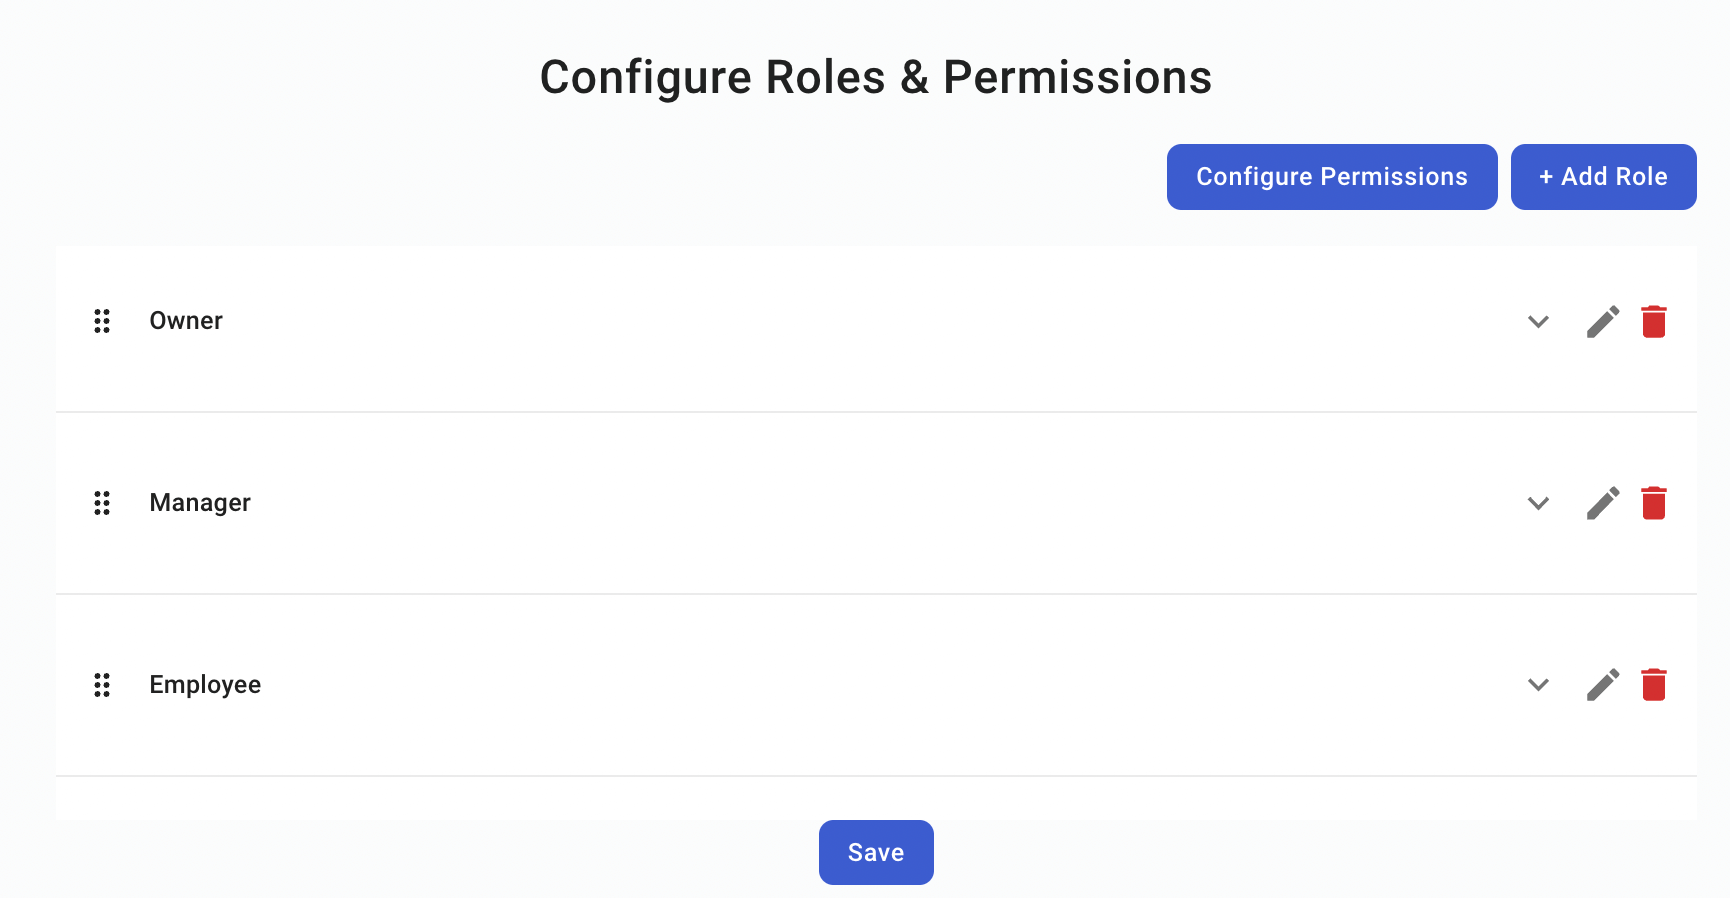
After creating a new restaurant, an Owner can invite users and specify their role.
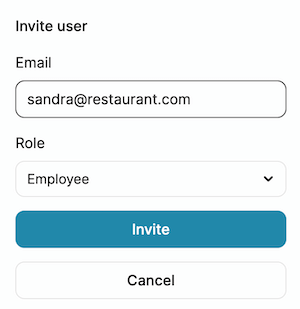
The nice thing here is that our users can manage their restaurants entirely on their own. Owners and managers can invite new employees or remove existing ones. All we ever have to worry about is:
- What is the role structure that makes sense for our product?
- What actions can users with different roles take within our product?
Next we’ll see an example of that.
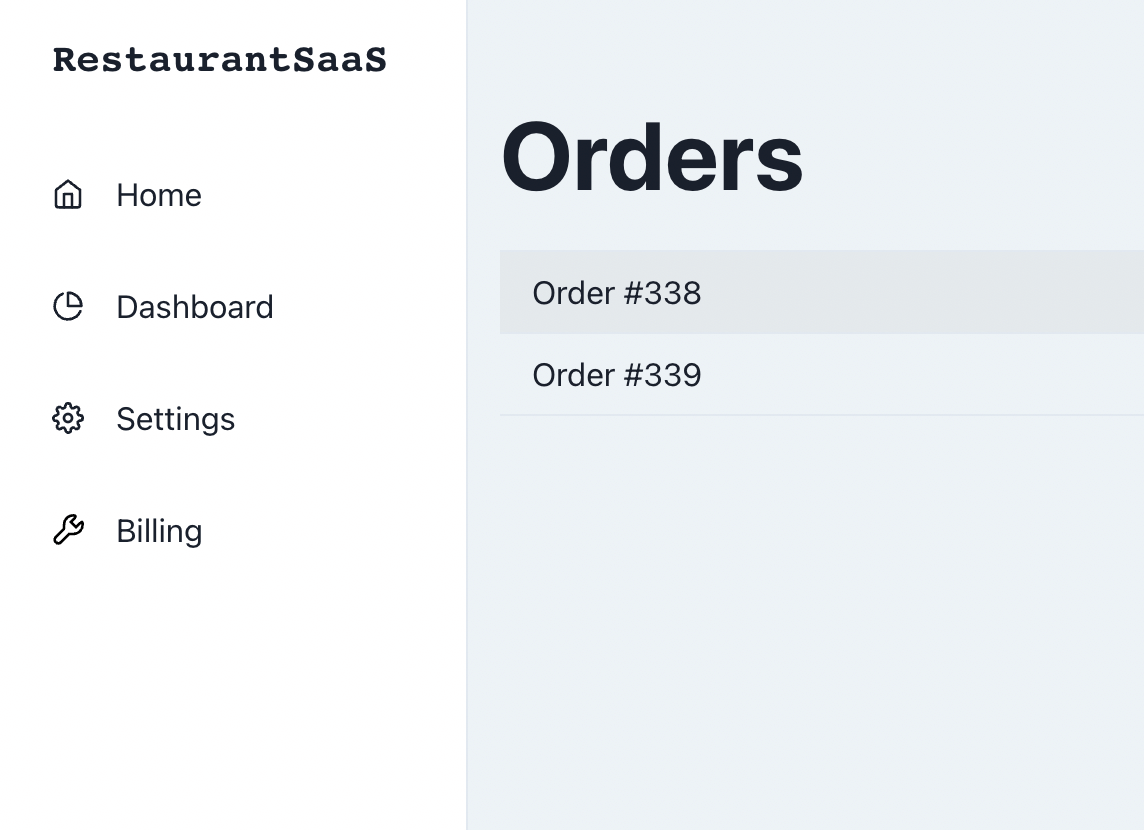
Customizing the Sidebar with accessHelper
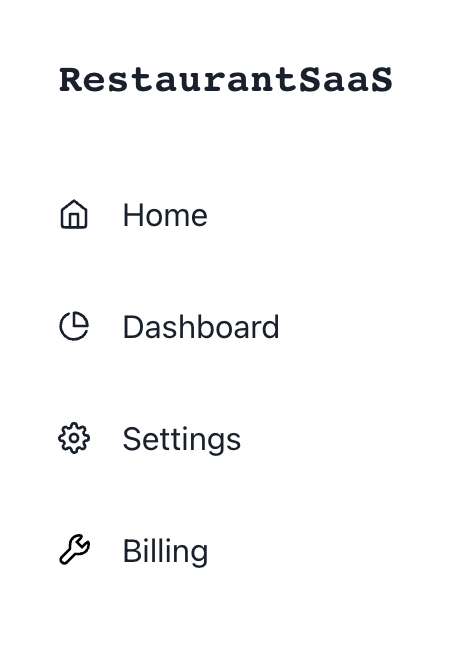
We’ll start with a Sidebar (thanks to Chakra Templates) where we pass in the items we want to render:
const ALL_SIDEBAR_ITEMS: Array<SidebarItems> = [
    {name: 'Home', icon: FiHome},
    {name: 'Dashboard', icon: FiPieChart},
    {name: 'Settings', icon: FiSettings},
    {name: 'Billing', icon: GrConfigure},
];

const Sidebar = () => {
    return <ChakraSidebar sidebarItems={sidebarItems}/>
}

export default Sidebar
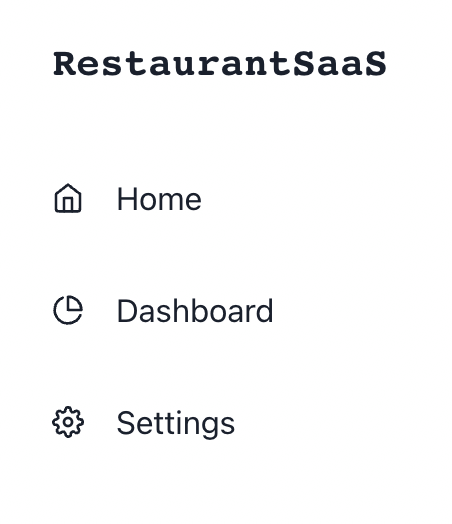
However, we have a small problem. In our product, we want only Owners ****to be able to see the Billing page. Let’s hide it for everyone else:
const ALL_SIDEBAR_ITEMS: Array<SidebarItems> = [
    {name: 'Home', icon: FiHome},
    {name: 'Dashboard', icon: FiPieChart},
    {name: 'Settings', icon: FiSettings},
    {name: 'Billing', icon: GrConfigure, requiredRole: "Owner"},
];

const Sidebar = withRequiredAuthInfo(({accessHelper}) => {
    const org = useActiveOrg()
    if (!org) return <div>Not found</div>

    const sidebarItems = ALL_SIDEBAR_ITEMS.filter(item => {
        !item.requiredRole || accessHelper.isRole(org.orgId, item.requiredRole)
    })

    return <ChakraSidebar sidebarItems={sidebarItems}/>
})

export default Sidebar
We again use withRequiredAuthInfo which gives us the prop accessHelper. The access helper allows us to check a user’s role or permissions within the active organization. We can then filter out the sidebar items the current user cannot see.
A quick note about security
An important point to make here is that hiding the billing page on the frontend is about usability, not security.
Ultimately, we’ll need to protect all our backend APIs around billing to make sure only Owners can access it as well. PropelAuth also provides backend libraries for that exact use case.
However, it’s a nicer experience to never see the Billing page rather than clicking on it and getting an error.
Summary
In the end, with less than 30 lines of code, we were able to:
- Add users to our product
- Allow those users to create and manage restaurants
- Setup RBAC for our product
- Choose which restaurant the user is actively viewing
- Select what information each user can see based on their role
All with the powerful abstractions provided by PropelAuth and the @propelauth/react library.