
Webflow Authentication with PropelAuth

PropelAuth fully manages your signup, login, and account management flows. Features like social login (Login with Google), passwordless/magic links, and profile picture management can be enabled in one click.

In this post, we're going to add authentication to a Webflow project, but first, let's talk about some reasons why you would want to use PropelAuth with a Webflow project:
- Works even without a backend. PropelAuth provides account pages, so your users can update their information even before you set up a backend. You can then display your user's information with just a couple of lines of javascript.
- Adding dynamic authenticated content to your site. When you do have a backend, you can make authenticated requests to it. You can, for example, embed a waitlist number or per-user dashboard information into your Webflow page by making a request to your backend.
- Take your auth with you. Maybe you are using Webflow but considering switching to Next.js/React. PropelAuth supports modern frameworks like Next.js so you can sign your users up today in Webflow and they can still log in if you switch. This is also true in reverse - Webflow is pretty great and easy for anyone to modify, if you are considering switching from a different framework.
Setting up Authentication
You can sign up for PropelAuth here. The first thing to do after you sign up is create your project:
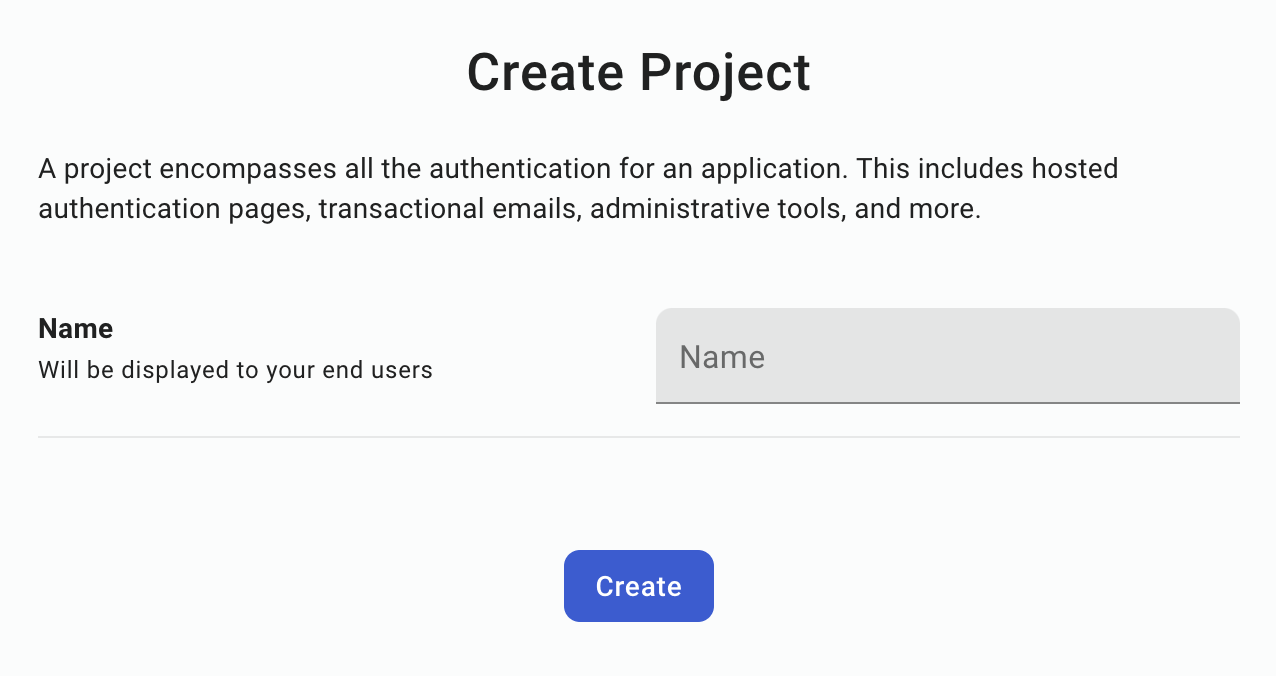
Afterwards, a test environment is created for you.
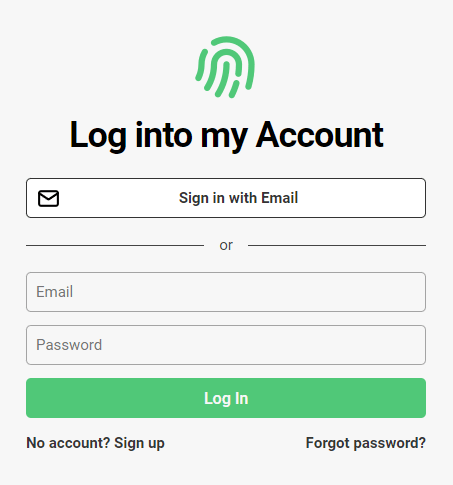
It includes login, signup, account pages, and optional organization management pages. There's a default logo, color scheme, and passwordless and password-based authentication. At this point, you can fully test what your end users will experience, transactional emails included, but you might want to configure its style first. You can do this in you dashboard under the Hosted Auth Pages section.
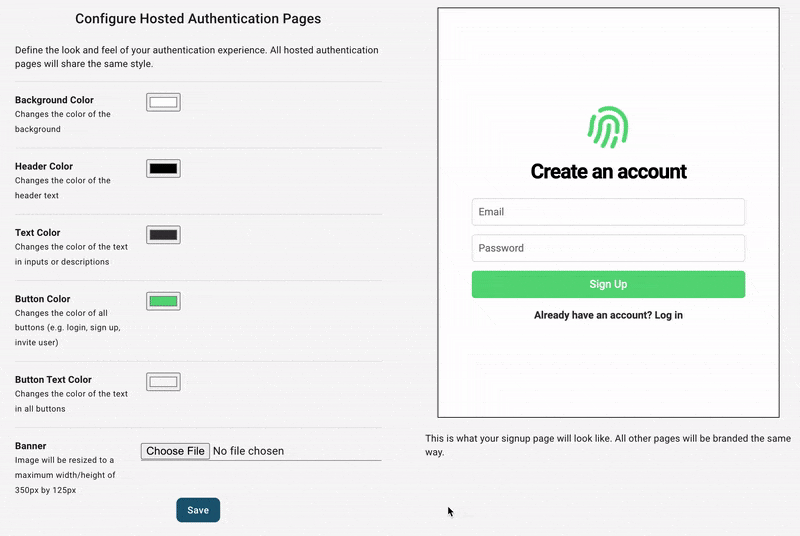
From here, you can configure other aspects of your end-user's auth experience, including:
- Adding "Login in with Google" or other SSO providers
- Collecting additional metadata on signup - like username or first name/last name
- Allowing your users to upload their own profile picture
- Letting your end-users create organizations and invite their coworkers (called B2B support)
After configuring your project, go to the Frontend Integration section of your project and make sure to select Webflow as your environment.
Authentication in Webflow
First, you'll want to add PropelAuth's javascript client to your page inside the <head> tag.
<script crossorigin
src="https://www.unpkg.com/@propelauth/javascript@1.2.0/dist/javascript.min.js"
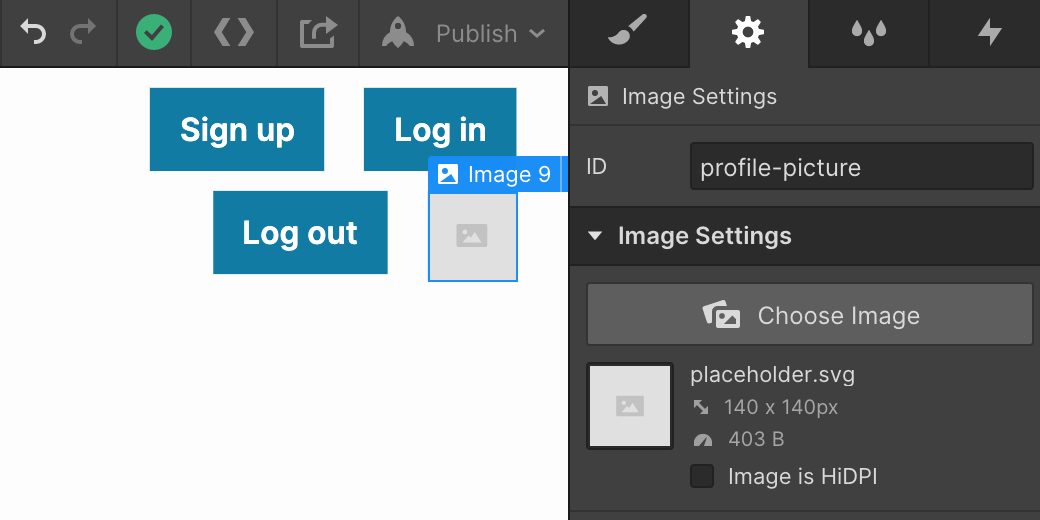
integrity="sha384-pMadYvjH0JNVI3hWTw5bcqu5qrOqBUXhcaTmBg4UjujHMuxd74zBO4ByZkZAQflR"></script>Then, we'll set up our page. We'll create two divs, one that we want to display when the user is logged in, and one that we want to display when the user is logged out.
When the user is logged out, we'll display Log in and Sign up buttons.
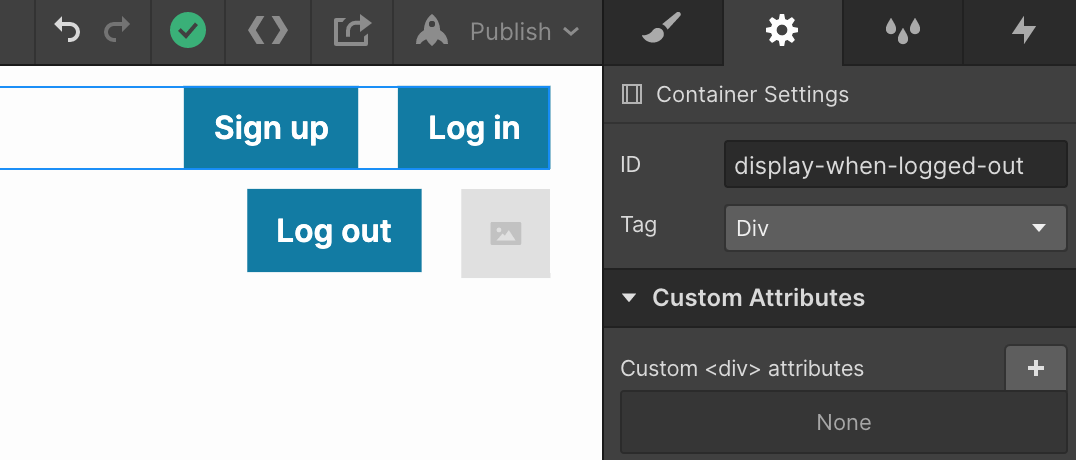
When the user is logged in, we'll display a Log out button and Profile picture.
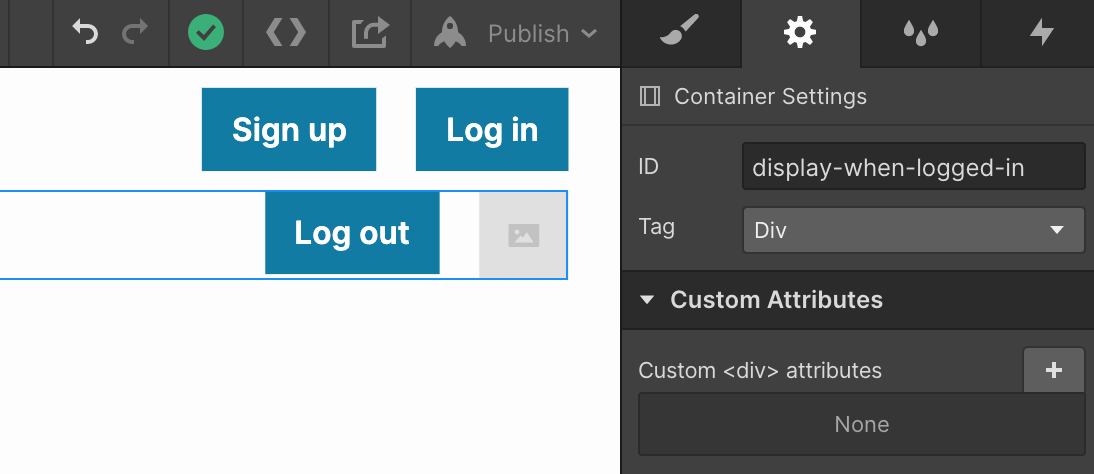
Finally, when the user clicks on any of these buttons, we want to take some action (clicking sign up should take them to the sign up page). We'll give each element an ID so we can reference it in javascript.
All that's left now is to add our javascript to the page which will hook up all the elements and display the correct div.
<script>
    const client = PropelAuth.createClient({
        authUrl: "https://subdomain.webflow.io", // Change me
        enableBackgroundTokenRefresh: true,
    });

    // Set up each element to go to a PropelAuth hosted page or logout
    document.getElementById("signup").onclick = client.redirectToSignupPage;
    document.getElementById("login").onclick = client.redirectToLoginPage;
    document.getElementById("profile-picture").onclick = client.redirectToAccountPage;
    document.getElementById("logout").onclick = client.logout;

    // Update the page based on the auth information we fetch from PropelAuth
    function updatePage() {
        client.getAuthenticationInfoOrNull().then(authInfo => {
            if (authInfo) {
                document.getElementById("profile-picture").src = authInfo.user.pictureUrl;
                document.getElementById("display-when-logged-in").style.display = "block";
                document.getElementById("display-when-logged-out").style.display = "none";
            } else {
                document.getElementById("display-when-logged-in").style.display = "none";
                document.getElementById("display-when-logged-out").style.display = "block";
            }
        })
    }

    // Whenever our user logs in or out, update the page
    client.addLoggedInChangeObserver(updatePage);
</script>
The authUrl is available on the Frontend Integration section of your PropelAuth project.
When a user logs in to our hosted pages, a secure, HTTP-only cookie is set. The javascript client is responsible for reaching out to PropelAuth and checking if the current user is logged in. If they are, it will fetch auth tokens and user information. In production, we require you use a custom domain to avoid third-party cookie issues for your users.
Wrapping up
With just a few buttons, an image, and some javascript, we were able to create a dynamic header with authentication. By using PropelAuth for authentication, we were able to skip building any auth UIs, transactional emails, 2FA enrollment, profile picture management, and more.
Check out our documentation for more examples, including how to make authenticated requests to a backend.
If you have any questions, please reach out at support@propelauth.com.