Authentication with Next.js and Supabase
In this guide, we’ll build an example Next.js server-side rendered application with PropelAuth and Supabase. We cover the Pages Router version of Next.js 13, and demonstrate how to create an application that manages both users and organizations using PropelAuth.
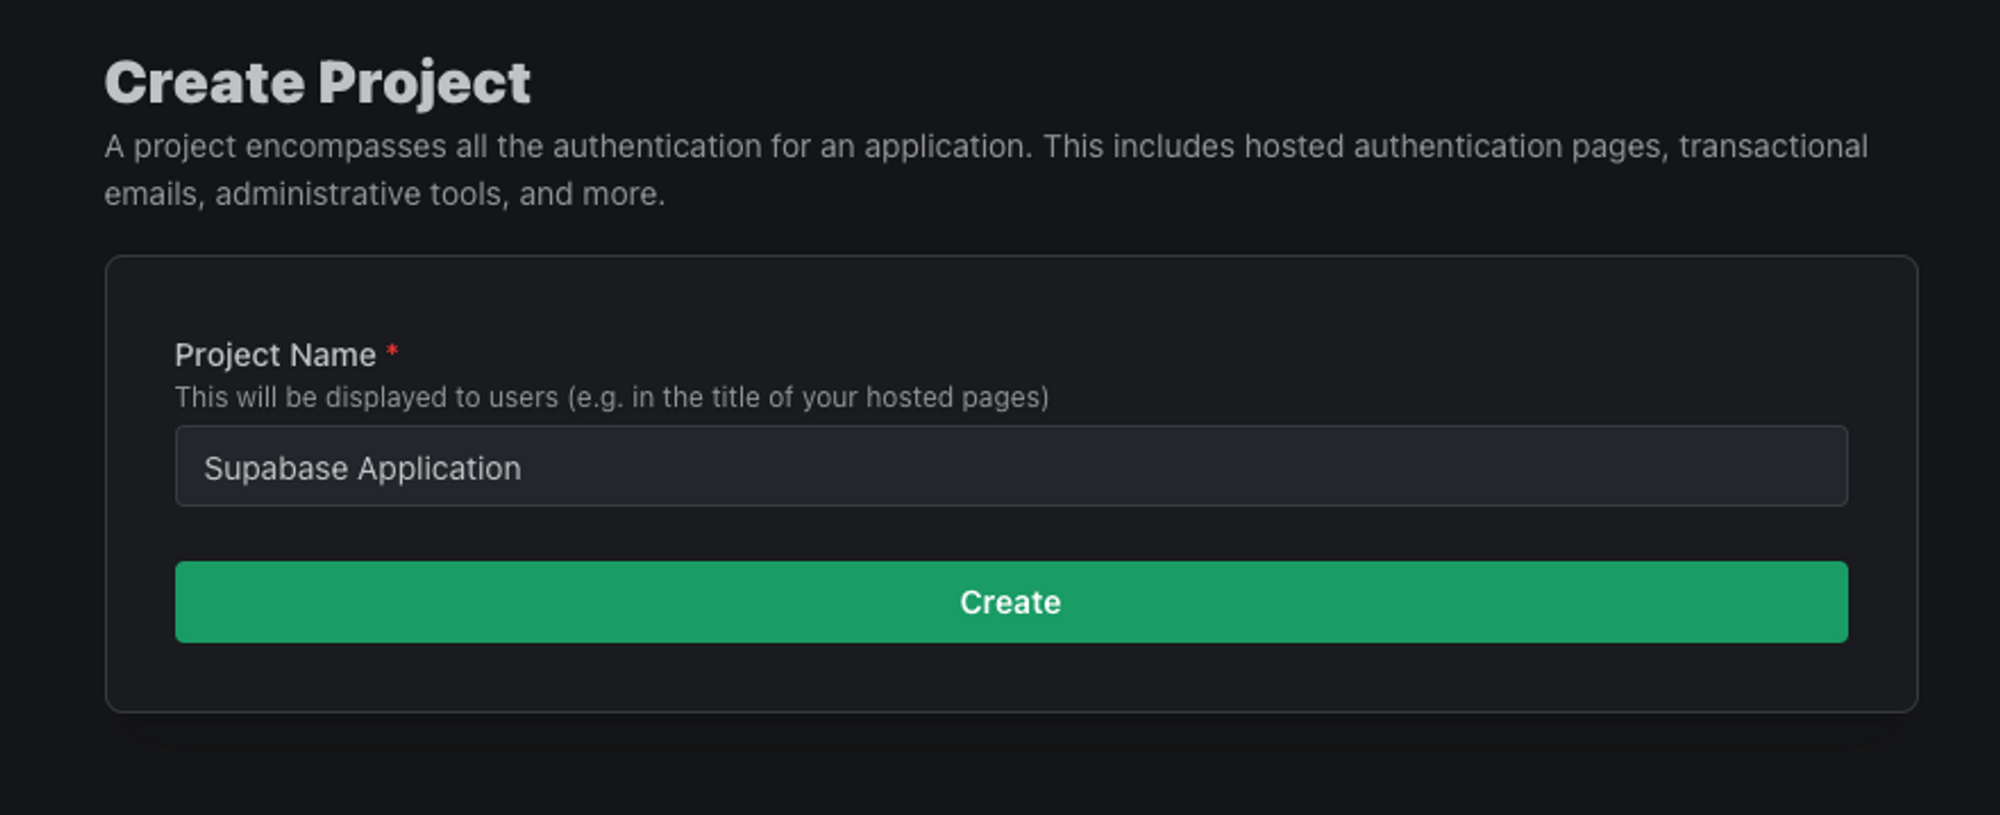
Create a PropelAuth Project
The first step is to create a project in PropelAuth, which we’ll be using instead of the default Supabase auth options.
Once a project has been created, you will be directed to the dashboard for your project, outlining the steps to complete adding authentication into your application. This includes styling the UI, choosing authentication methods, and enabling organizations/enterprise SSO.
One of the onboarding steps is to sign up as a test user, which we’ll use later on to test our application.
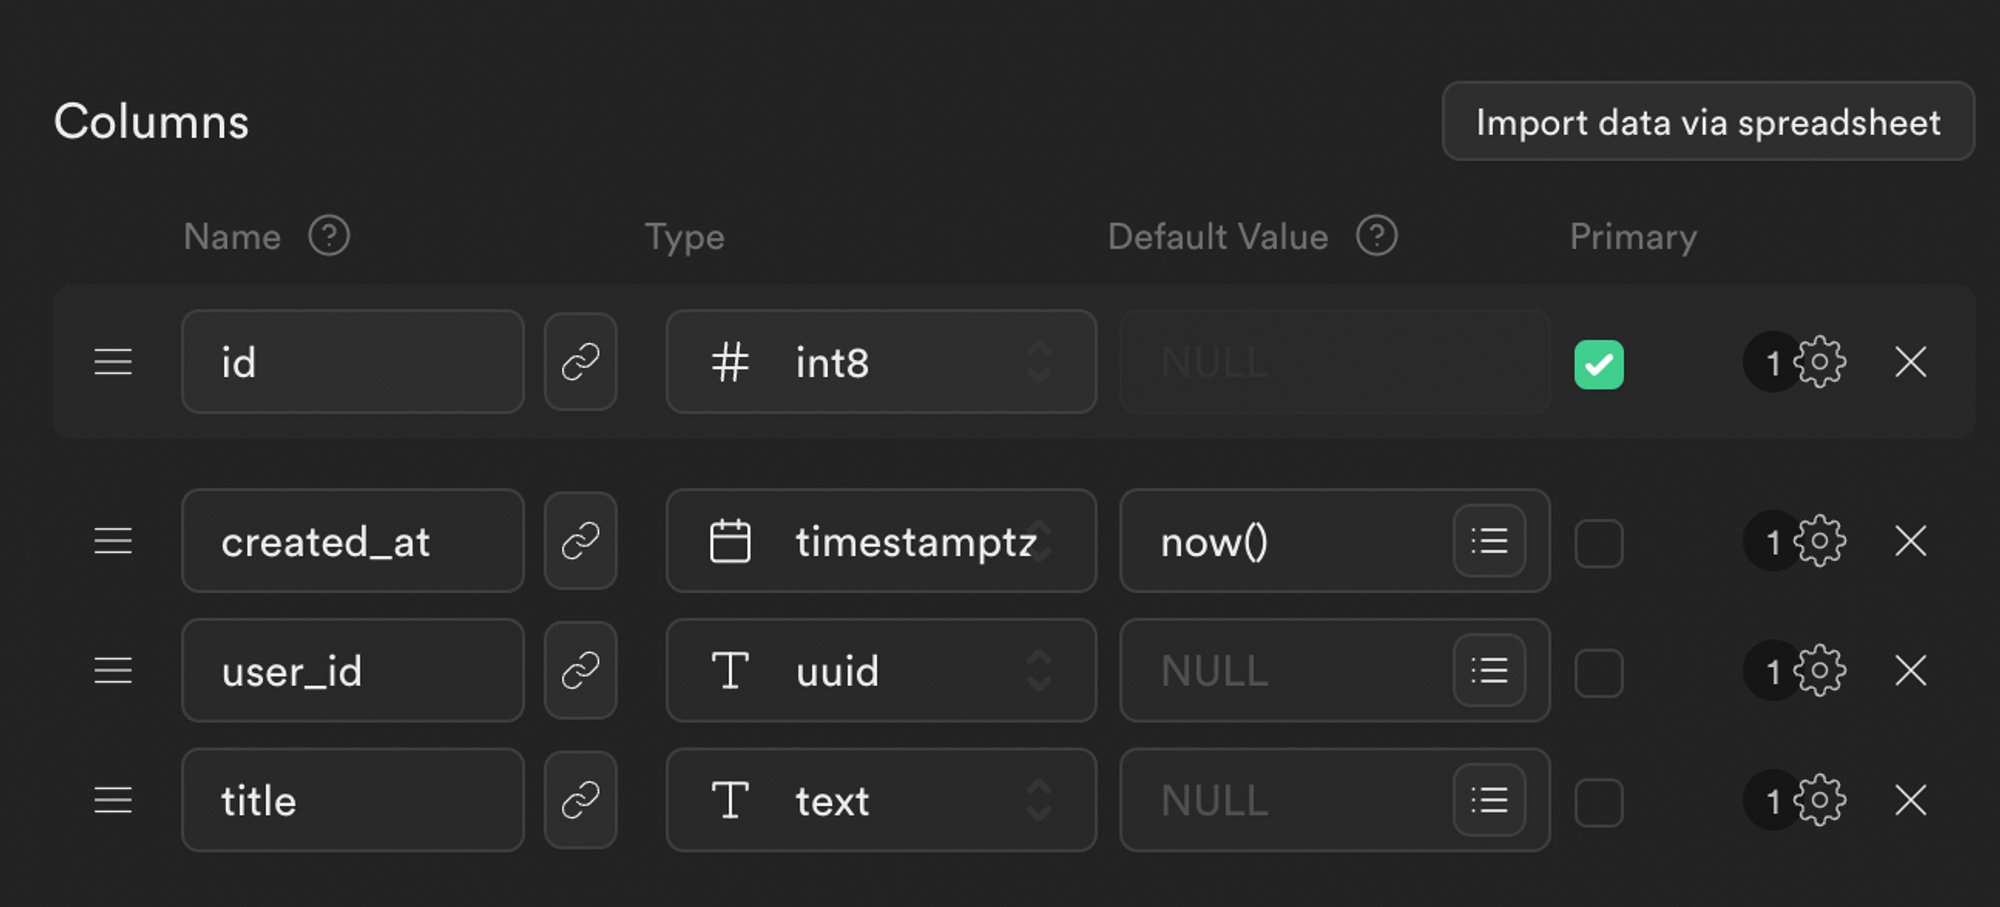
Create a Supabase Project
Create a Supabase project, along with at least one table in the project. You can configure the table however you’d like; in this guide, we’ll be using a table we’ll call “foos.”
One column in the table must be labeled “user_id,” and its type must be “uuid.” In our example, we also included “title” with the “Text” type.
Create and Configure a NextJS Application
Create a new Next.js project and install the @propelauth/nextjs library:
npx create-next-app <project-name>
cd <project-name>
npm i @propelauth/nextjs
Create a .env file with the following variables
NEXT_PUBLIC_AUTH_URL='https://YOUR_AUTH_URL.propelauthtest.com'
PROPELAUTH_API_KEY='YOUR_API_KEY'
PROPELAUTH_REDIRECT_URI='http://localhost:3000/api/auth/callback'
PROPELAUTH_VERIFIER_KEY=-----BEGIN PUBLIC KEY-----\\nMIIBIjANBgk...
SUPABASE_URL='YOUR_SUPABASE_URL'
SUPABASE_API_KEY='YOUR_SUPABASE_API_KEY'
SUPABASE_JWT_SECRET='YOUR_SUPABASE_JWT_SECRET'
When you copy the PROPELAUTH_VERIFIER_KEY from the PropelAuth dashboard, it will automatically paste into your .env file with line breaks. However, due to the way some systems interpret multiline environment variables, you will need to edit the verifier key value to include ‘\n’ instead of newline characters. For example:
PROPELAUTH_VERIFIER_KEY=-----BEGIN PUBLIC KEY-----\\nMIIBIjANBgk...
For the PROPELAUTH_REDIRECT_URI variable, you need to add /api/auth/callback to the end of one of your allowed frontend locations. So, for example, if you are developing in the test environment and using http://localhost:3000, you would use **http://localhost:3000/api/auth/callback**
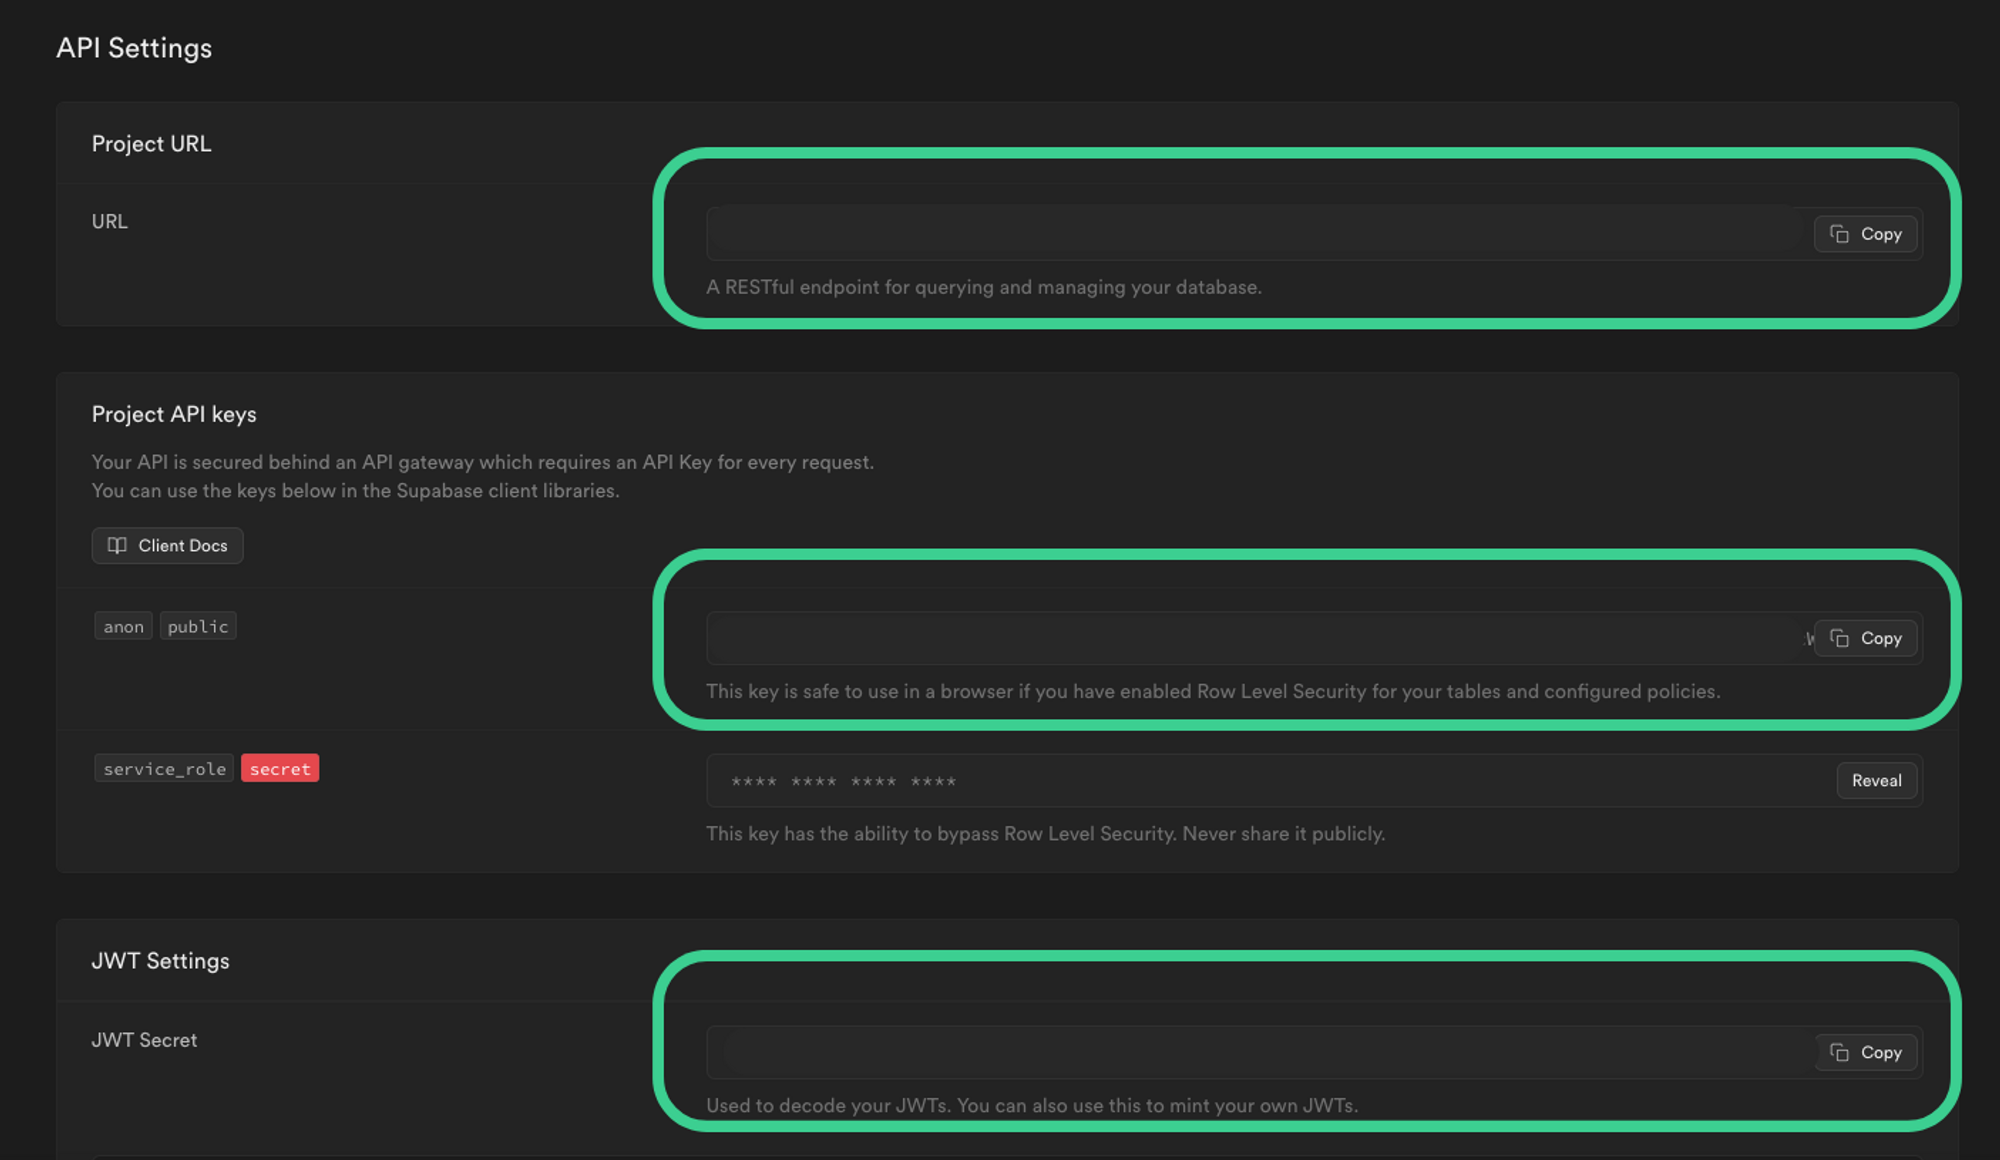
Finally, the required Supabase variables required can be found in the API settings for your Supabase project.
Set Up Routes
Create the directory src/app/api/auth/[slug] (or just app/api/auth/[slug] if you aren’t using src), and in that directory, create a file called route.ts with the following content:
import {getRouteHandlers} from "@propelauth/nextjs/server/app-router";
import {NextRequest} from "next/server";

// postLoginRedirectPathFn is optional, but if you want to redirect the user to a different page after login, you can do so here.
const routeHandlers = getRouteHandlers({
  postLoginRedirectPathFn: (req: NextRequest) => {
    return "/"
  }
})
export const GET = routeHandlers.getRouteHandler
export const POST = routeHandlers.postRouteHandler
This enables requests made to /api/auth/* to be handled by our library and set up/refresh/invalidate user information for you.
Set up AuthProvider
In your _app.tsx file, add the AuthProvider:
import {AuthProvider} from "@propelauth/nextjs/client";
export default function MyApp({Component, pageProps}: AppProps) {
  return (
    <AuthProvider authUrl={process.env.NEXT_PUBLIC_AUTH_URL}>
      <Component {...pageProps} />
    </AuthProvider>
  )
}
Set Up the Supabase Client
Next, we’re going to set up a Supabase client and have it use our user information provided by PropelAuth. Install the Supabase javascript package, as well as a library called jsonwebtoken
npm i @supabase/supabase-js jsonwebtoken
Then add the following code to a new file lib/supabase.ts. The function getSupabaseClient will create a Supabase client for our PropelAuth user.
import {createClient, SupabaseClientOptions} from '@supabase/supabase-js'
import {UserFromToken} from '@propelauth/nextjs/client';
import jwt from "jsonwebtoken";

export const getSupabaseClient = async (user: UserFromToken) => {
  const jwtPayload = {
    sub: user.userId,
    email: user.email,
    iss: "supabase",
    aud: "authenticated",
    role: "authenticated",
  }

  const supabaseAccessToken = jwt.sign(jwtPayload, process.env.SUPABASE_JWT_SECRET, {
	expiresIn: '15 minutes'
  })

  const options: SupabaseClientOptions<any> = {
    global: {
      headers: {
        Authorization: `Bearer ${supabaseAccessToken}`,
      }
    },
    auth: {
      persistSession: false,
    }
  }

  return createClient(
    process.env.SUPABASE_URL,
    process.env.SUPABASE_API_KEY,
    options
  )
}
Fetch Supabase Data
From here, we can use this client to make fetch information from Supabase as our PropelAuth user. As we’ll see in the next section, we’ll use row-level security (RLS) to make sure our user can only access their own data.
import {GetServerSideProps} from "next";
import {getSupabaseClient} from "@/lib/supabase";
import {getUserFromServerSideProps} from "@propelauth/nextjs/server/pages";
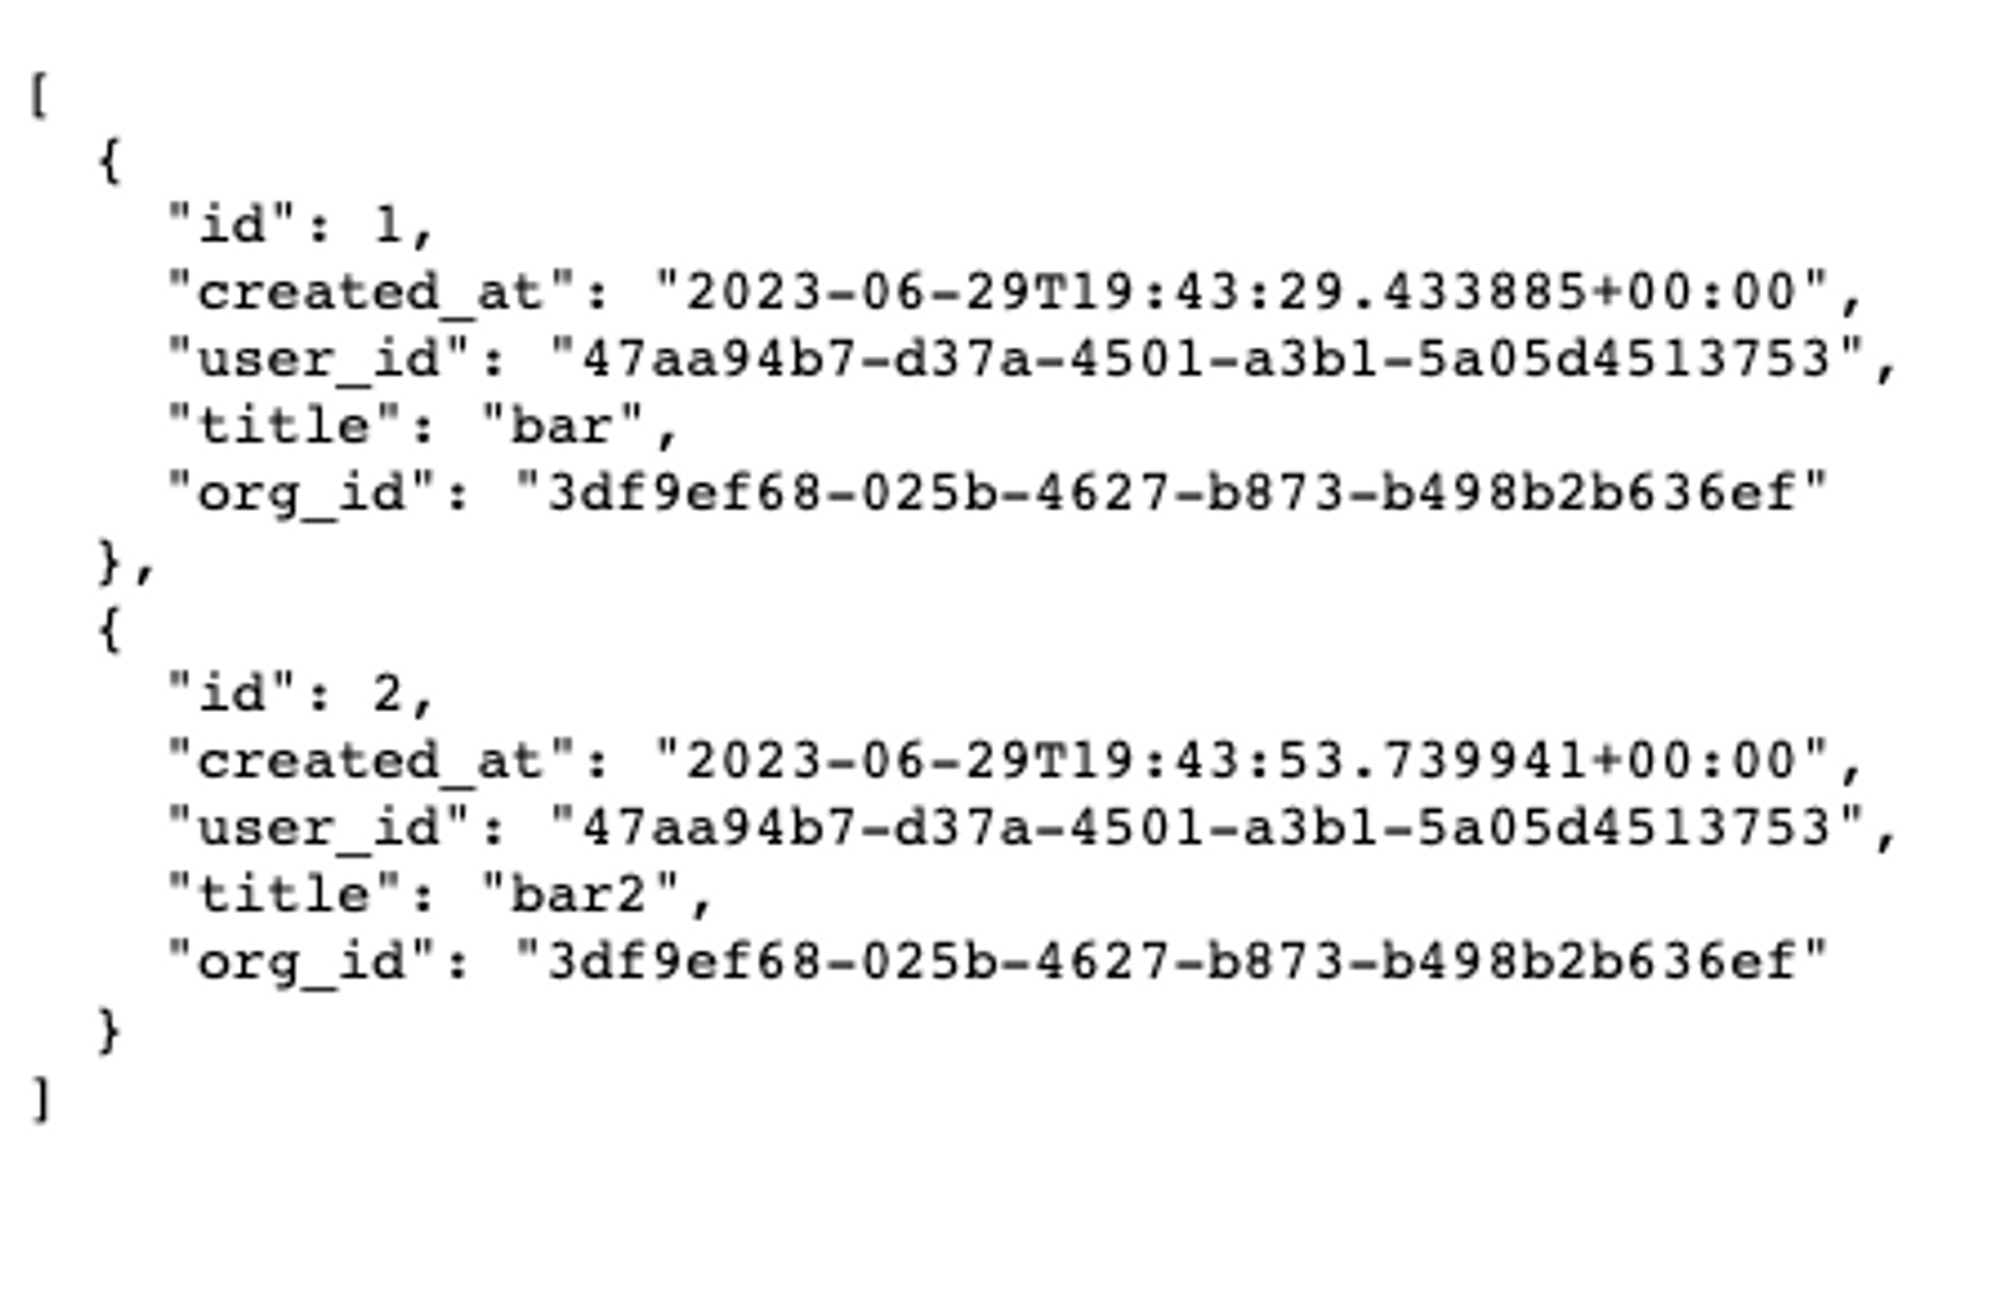
export default function Page({ foos }: Foos) {
return (
<pre>{JSON.stringify(foos, null, 2)}</pre>
);
}
type Foos = {
foos: any[] | null
}
export const getServerSideProps: GetServerSideProps<Foos> = async (context) => {
const user = await getUserFromServerSideProps(context)
if (!user) {
return redirectToLogin();
}
const supabase = await getSupabaseClient(user)
let { data } = await supabase.from('foos').select()
return {
props: {
foos: data
},
}
}
function redirectToLogin() {
return {
redirect: {
destination: '/api/auth/login',
permanent: false,
},
}
}
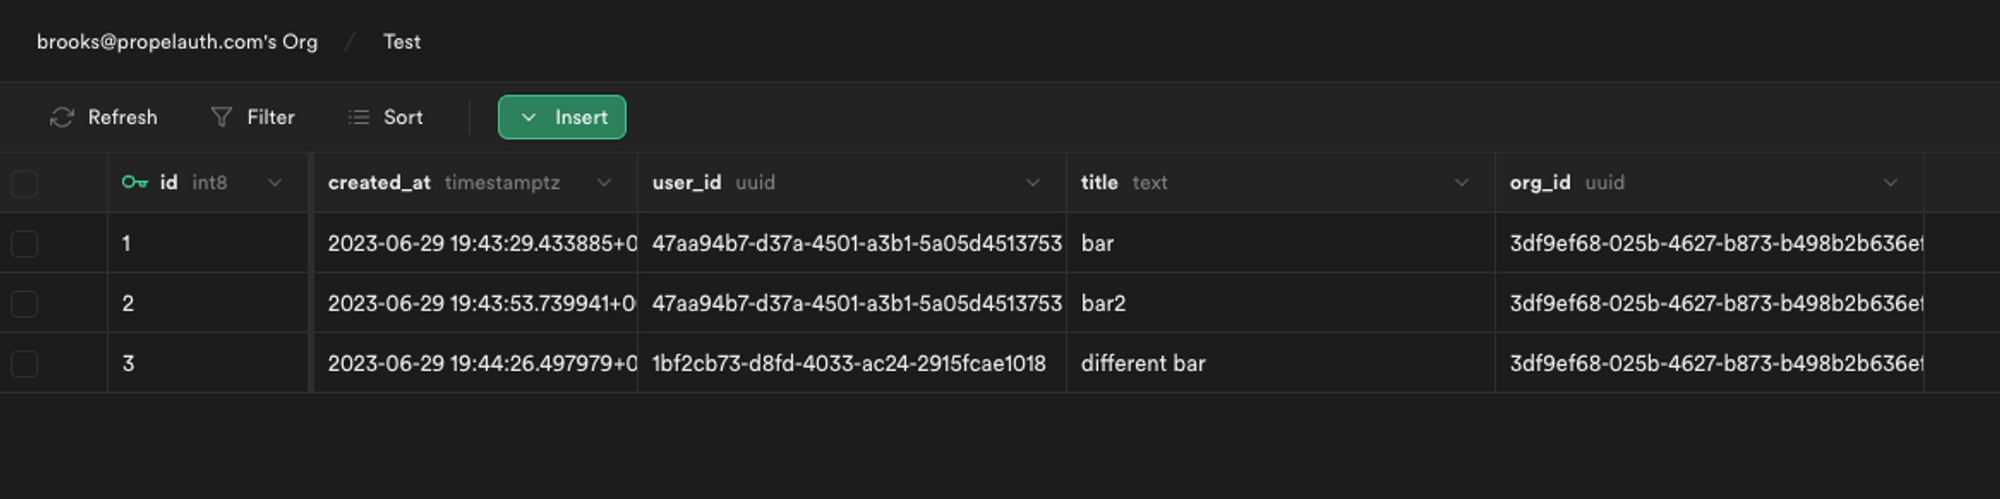
Testing our application
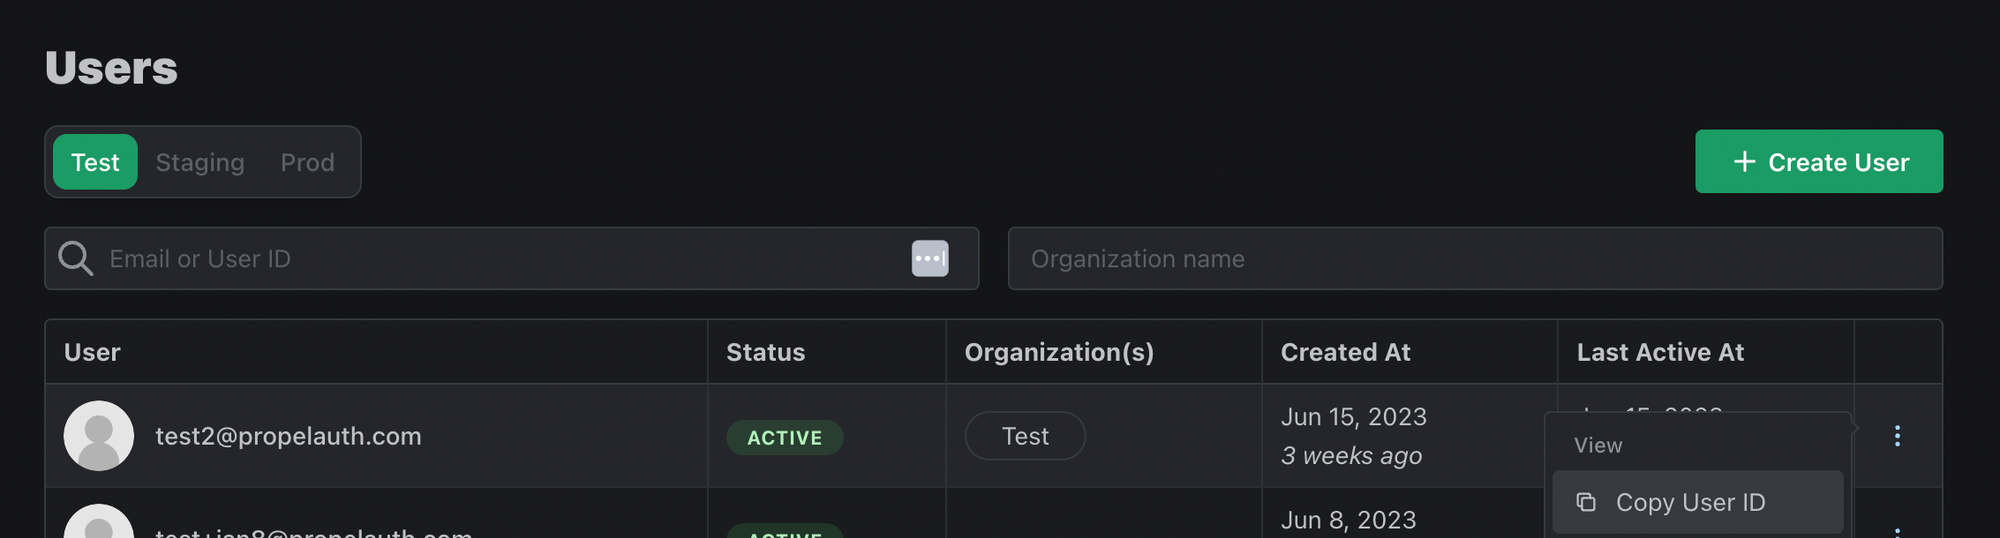
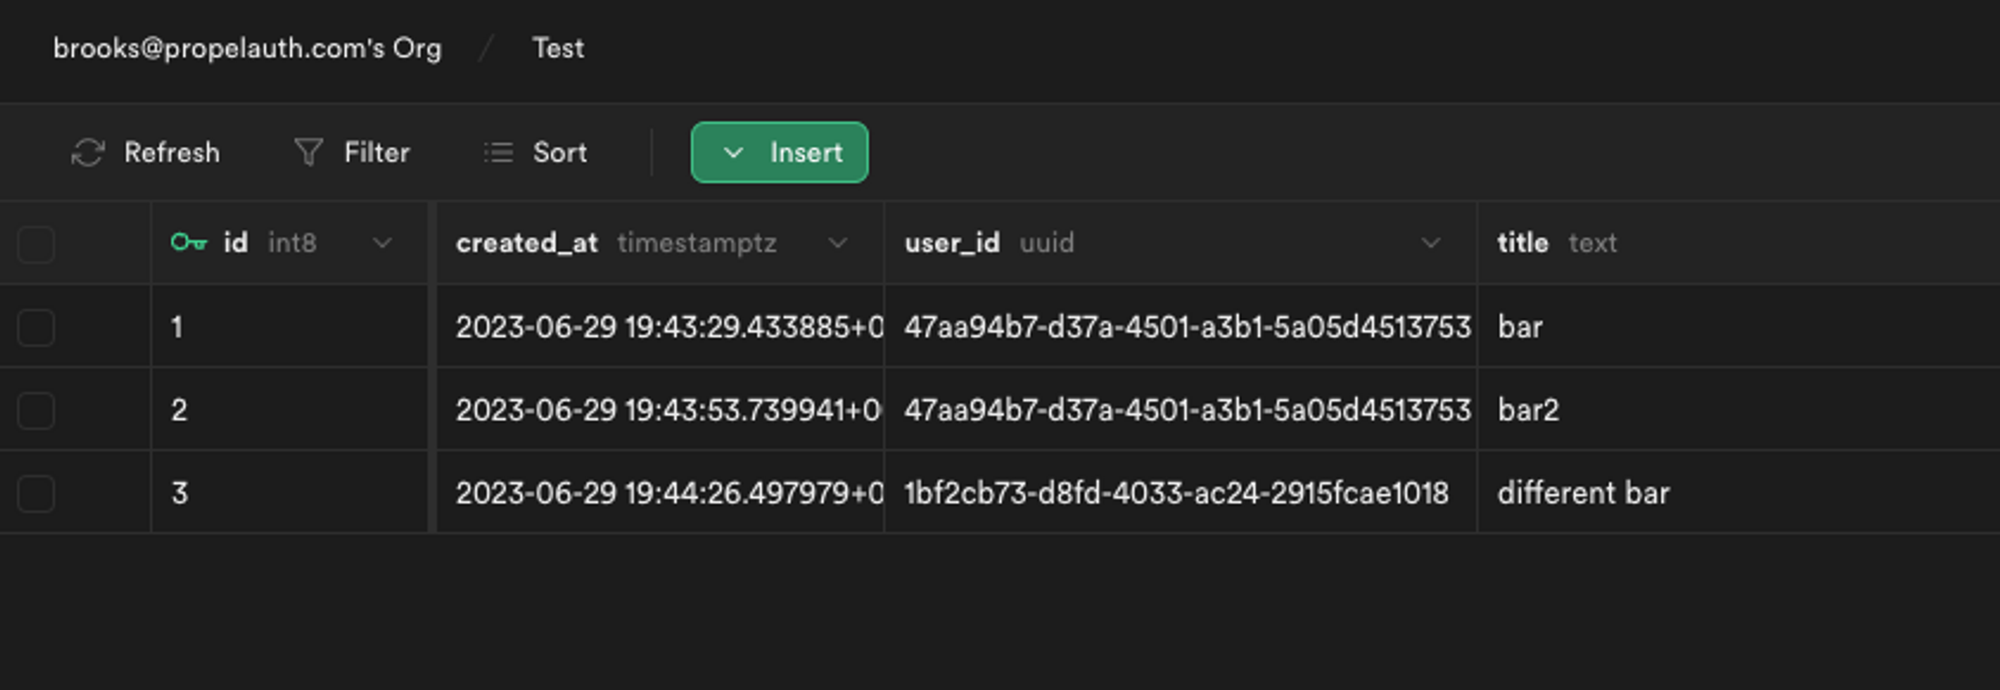
Finally, let’s add some test data to the Supabase table along with our user ID from the sample user we created at the beginning of this guide. You can get the user ID for our sample user either by console.log'ing the user object, or by using the PropelAuth dashboard to copy the User’s ID.
We’ll also add some rows for a different user to make sure we are only fetching our own data.
Setting up an RLS Policy
If we run our application locally, we don’t see any data at all. Just []. That’s because we haven’t set up an RLS policy yet.
We’ll do a really simple policy - each user should be able to see their own data, which is done by checking auth.uid() is equal to user_id from the table.
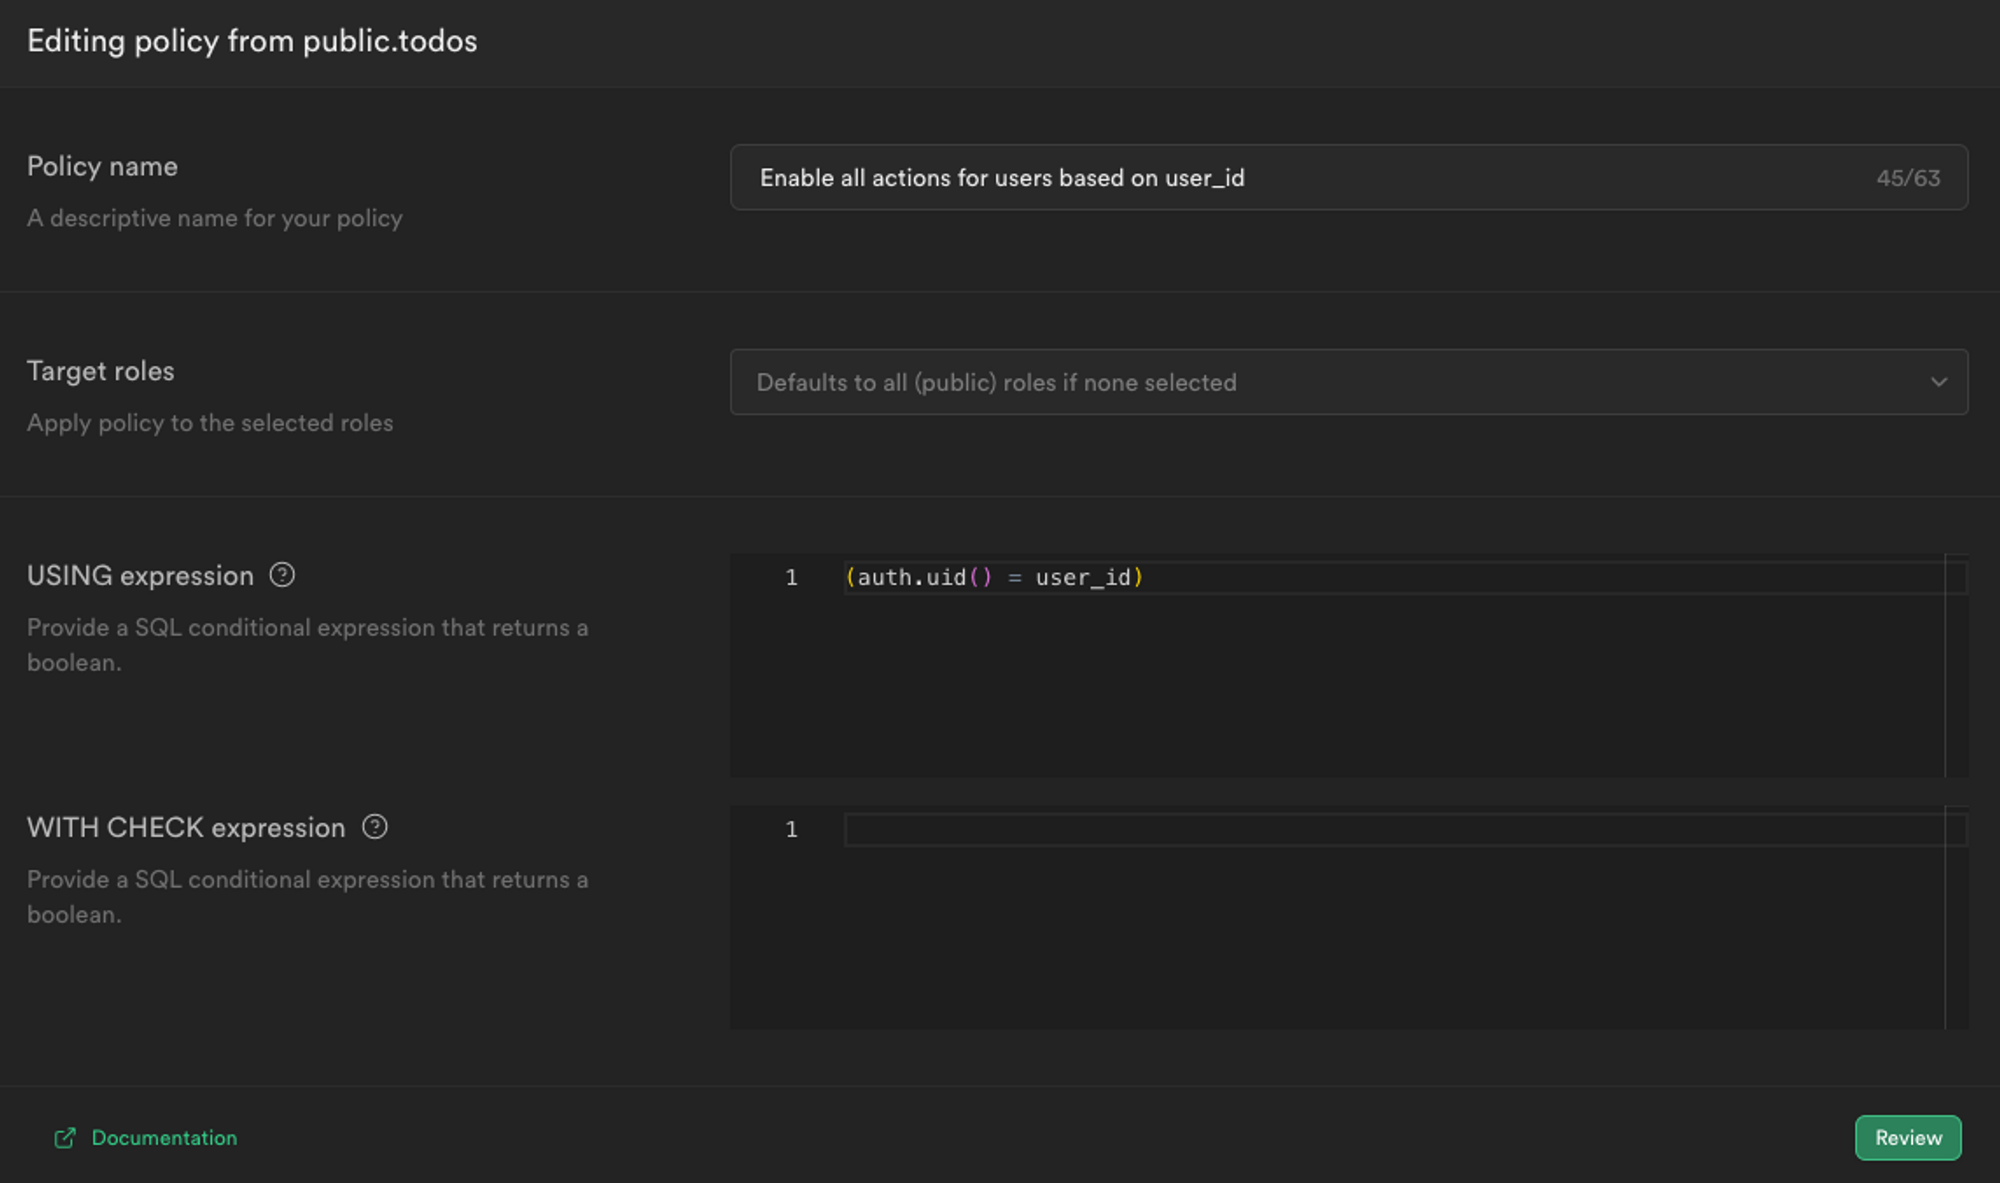
After saving that policy, we should see our data rendered correctly!
A Note on Organizations / Multi-Tenancy
One of the central features of PropelAuth is the ability to easily enable B2B authentication features like organizations and role-based access control.
In terms of working with organizations in Supabase, adding a uuid column to our table that includes an org_id is simple enough.
In our lib/supabase.ts file, we can then update it to include organization information.
By default, users can be in more than one organization, and PropelAuth is flexible to how you can reference a single organization.
You can pass the orgName in as a subdomain or path paramater, you can set the orgId as a cookie, or you can require each user to be in exactly 1 organization and just use the one org you know they are in. In this case, we’ll assume you set the orgId as a cookie and passed it in:
export const getSupabaseClient = async (user: UserFromToken, orgId?: string) => {
	const jwtPayload = {
		"sub": user.userId,
		"email": user.email,
    // Make sure to check that the user is in this organization
    "org_id": orgId ? user.getOrg(orgId)?.orgId : undefined
	}
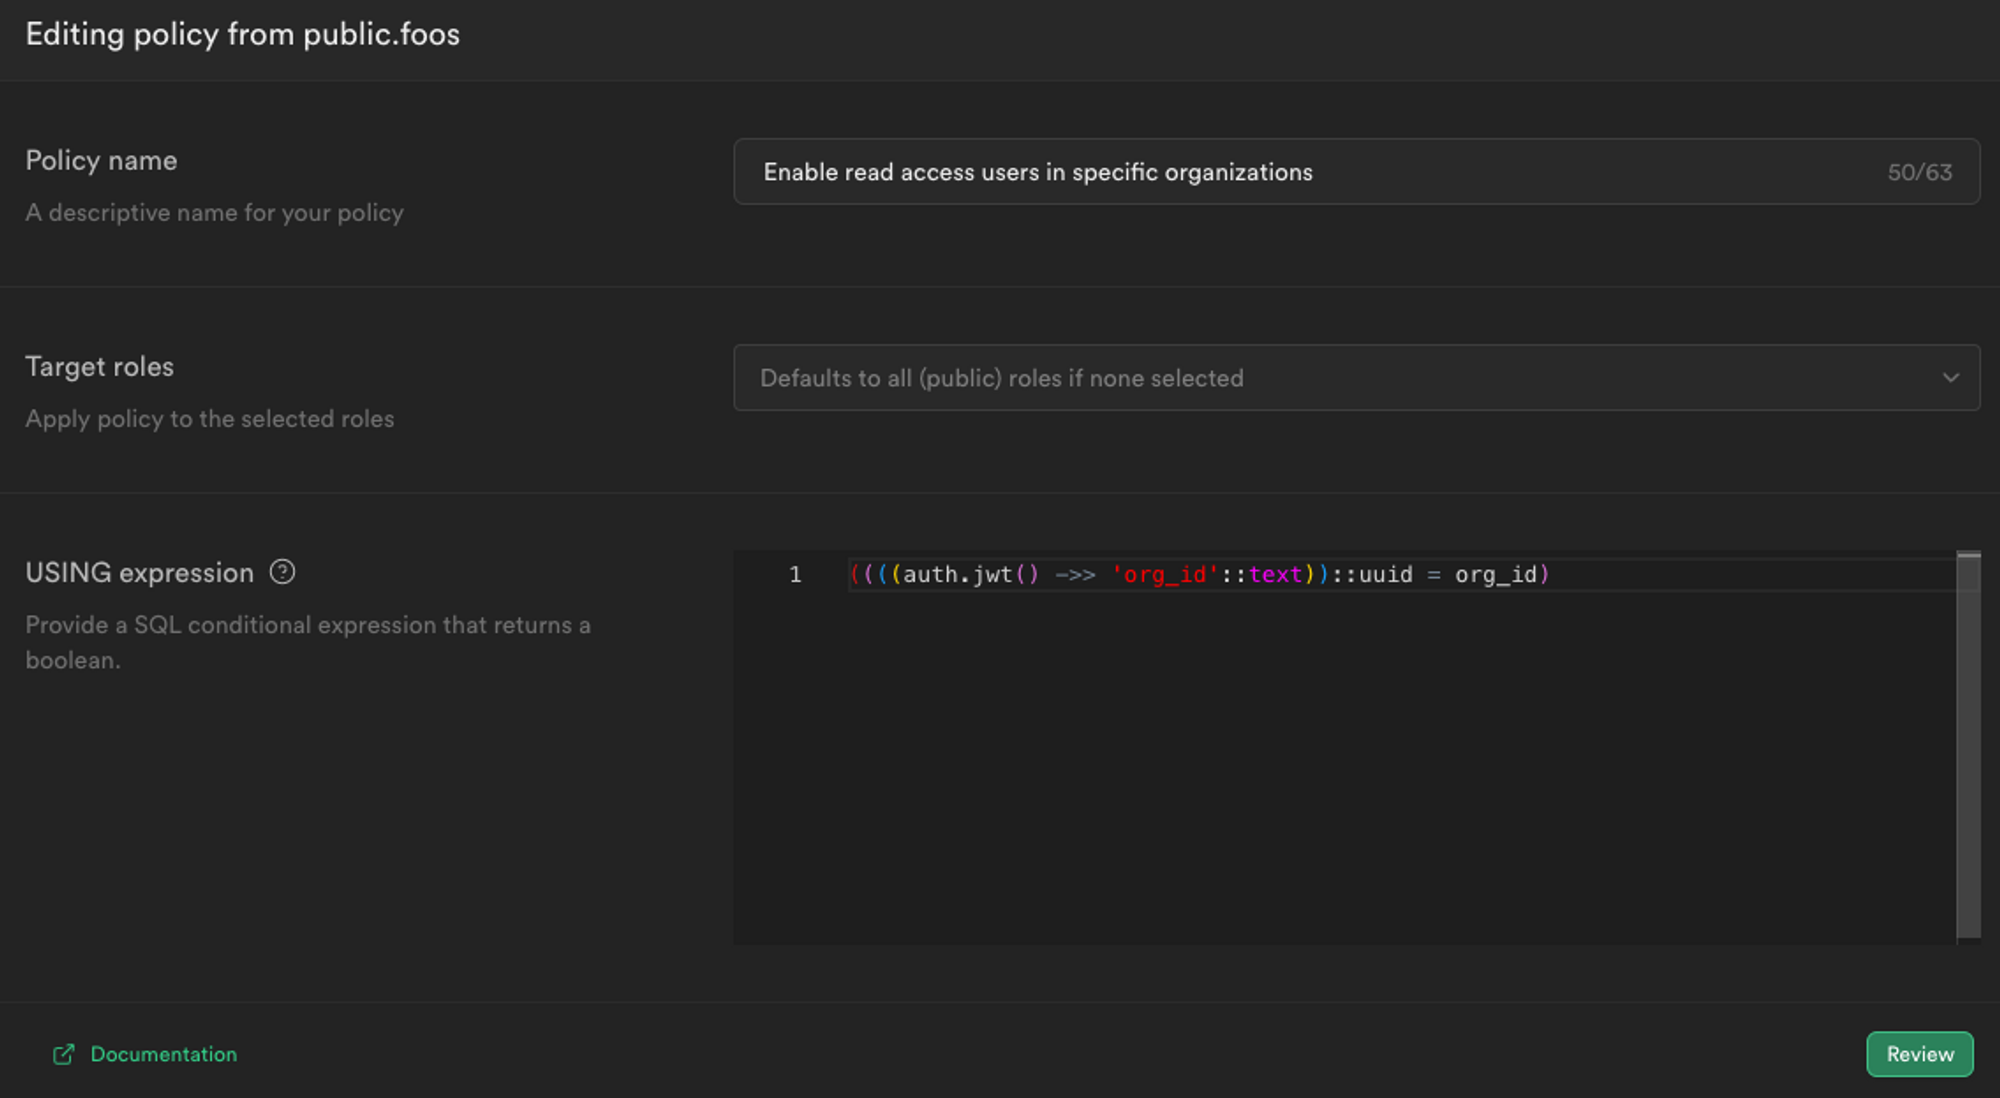
Then, you would need to add a new RLS Policy that matches a specific org_id to the ones present in the table.
You can add additional checks by adding checking the user’s role
const isAdmin = user.getOrg(orgId)?.isRole("Admin")
or placing their role in the JWT and using it in your RLS policies.
Wrapping Up
This guide provides comprehensive look at a server-side rendered authentication application framework using Supabase and Next.js. By using PropelAuth for authentication, we were able to skip building any auth UIs, transactional emails, invitation flows, and more.
If you’re like more tutorials, check out our Next.js Example App, or check out our documentation for more information on building with PropelAuth.
If you have any questions, please reach out at support@propelauth.com.