MCP Authentication with FastMCP
MCP servers are just a clean way to give an AI client (like Claude Desktop, Claude Code, ChatGPT, etc) a set of functions it can call. This can really be anything, like:
- A function that fetches the weather for a date/zip code
- A function that loads your calendar data from Google Calendar
- A function that manages your weekly goals in a file on your computer
- A function that manages weekly goals in a database for all employees of a company
We’re going to show how we can build an example MCP server and then secure it by adding authentication & authorization. We’ll do this in two steps:
- We’ll build a tiny, unauthenticated MCP server with a
whoamitool that always returns:{"user": "unknown"}. - We’ll update that tool to return
{"user": "{logged_in_users_email}"}(and only if the user has consented to theread:whoamiscope)
We’ll use FastMCP (Python) and PropelAuth’s MCP support.
Step 0: Set up our project
We’ll use uv to create a virtual environment and install FastMCP:
uv init whoami
cd whoami
uv venv                     # create a virtual env
source .venv/bin/activate   # activate our virtual env
uv add "fastmcp>=2,<3"      # 3 is currently still in beta
Step 1: Build the unauthenticated MCP server
Create a file called server.py:
from fastmcp import FastMCP

mcp = FastMCP("Who Am I")

@mcp.tool()
def whoami() -> dict[str, str]:
    """Returns the currently authenticated user"""
    return {"username": "unknown"}

if __name__ == "__main__":
    mcp.run(transport="http", host="127.0.0.1", port=8000)
We can then run this, which will create an MCP endpoint at http://localhost:8000/mcp
uv run server.py
Let’s test this! We’ll want to have our AI Client connect to our MCP Server. There’s only one problem:
…not every AI client will work with locally running servers. We’ll need to set up a tunnel so clients like Claude Desktop can connect to our server.
Step 2: Use ngrok so external clients can reach your server
If your MCP server is only available on localhost, Claude Desktop won’t be able to connect to it. Claude needs to reach a URL over the internet.
In a second terminal, run:
ngrok http 8000
ngrok will print a public HTTPS URL like https://abc123.ngrok-free.app which tunnels the connection to your locally running MCP Server.
Your MCP URL is then https://abc123.ngrok-free.app/mcp
Step 3: Test our MCP Server
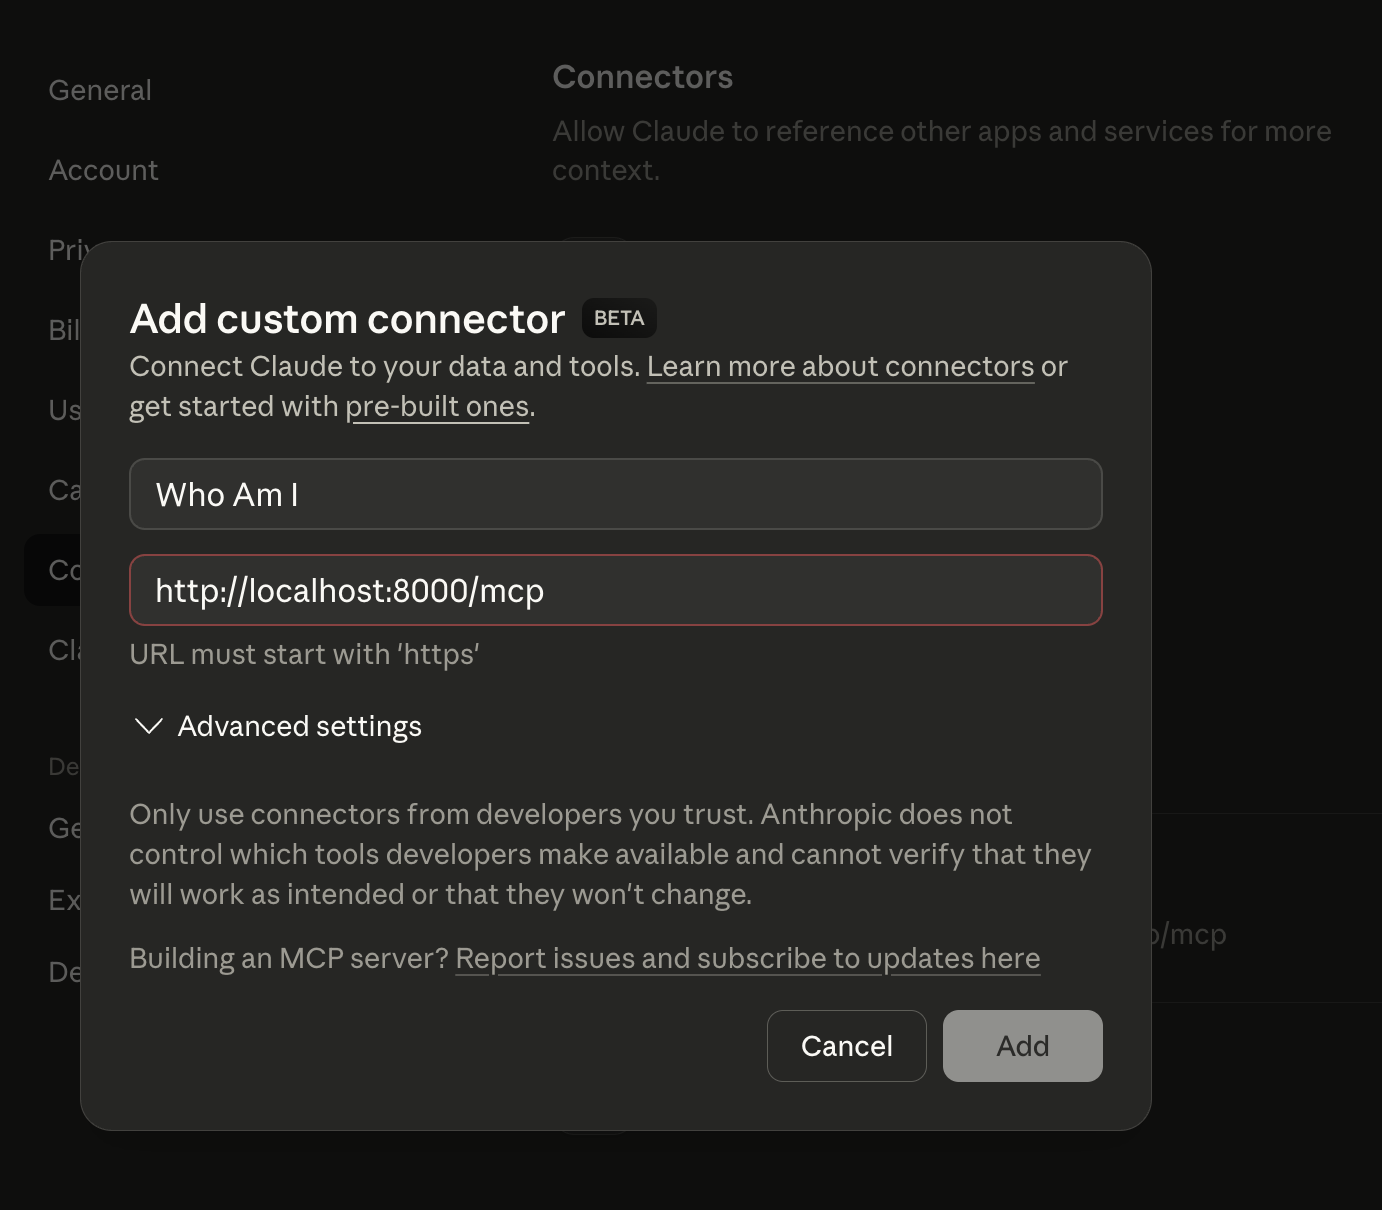
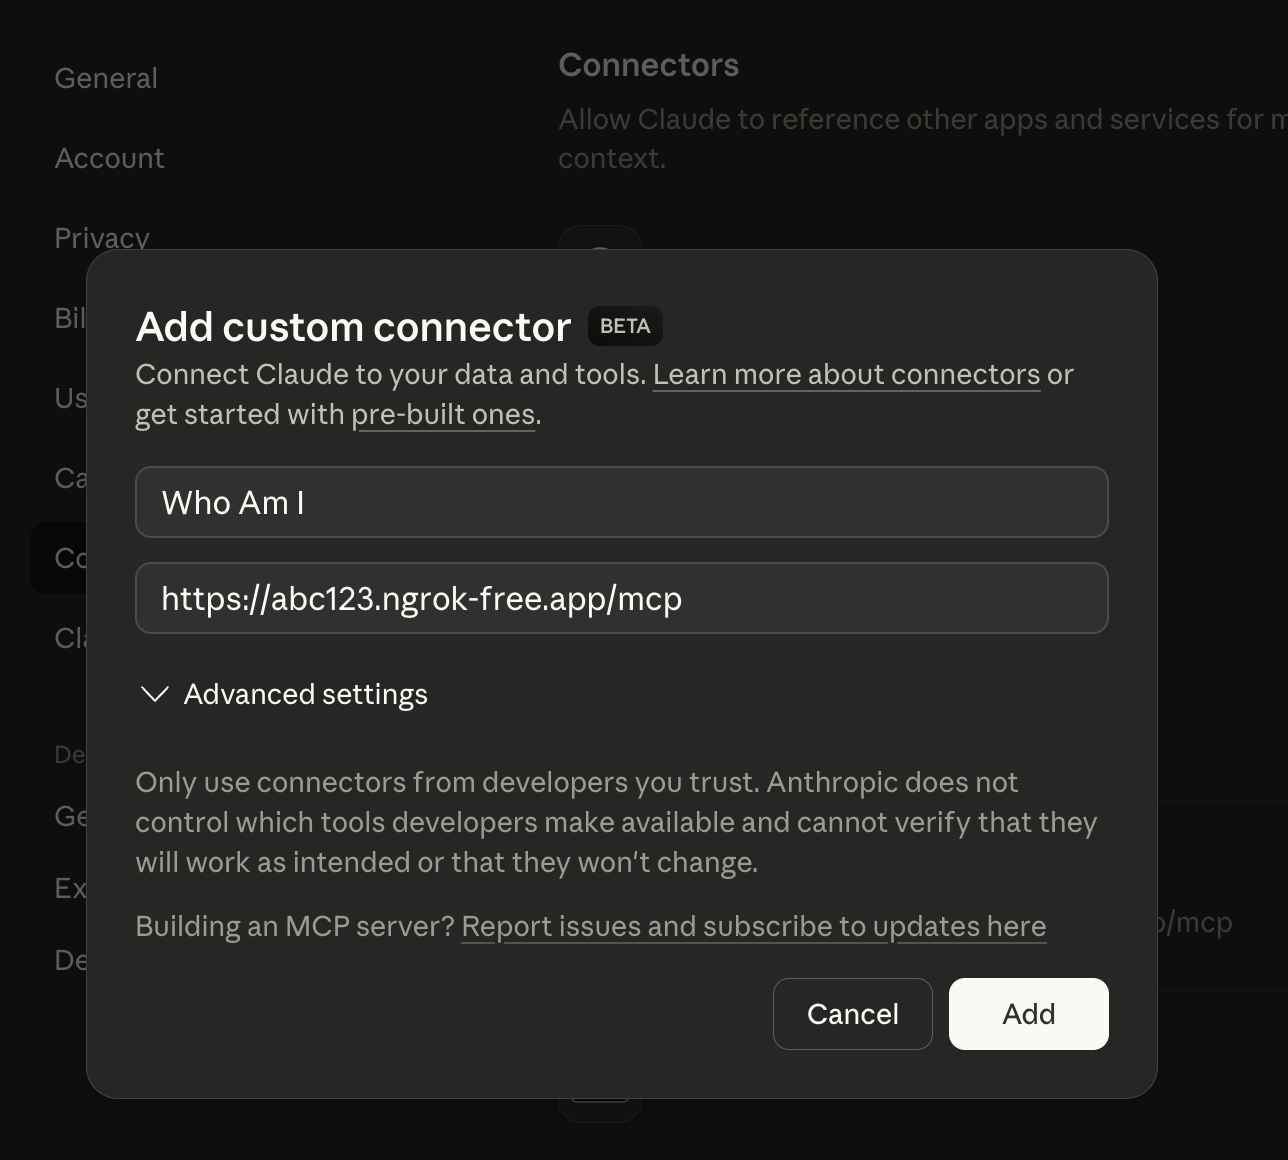
We’ll continue using Claude Desktop for testing. Go to Settings ⇒ Connectors ⇒ Add custom connector. Enter a name for your MCP Server as well as your MCP URL:
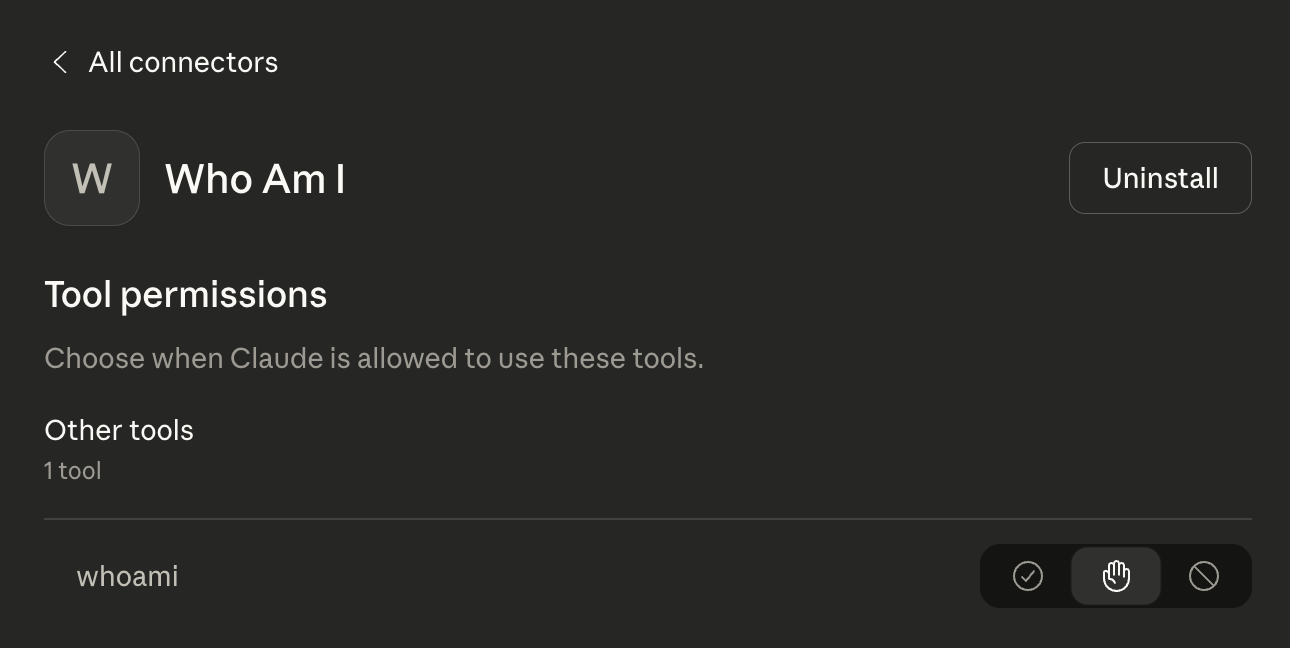
After it connects, you should be able to configure the server which will show you which tools the server has:
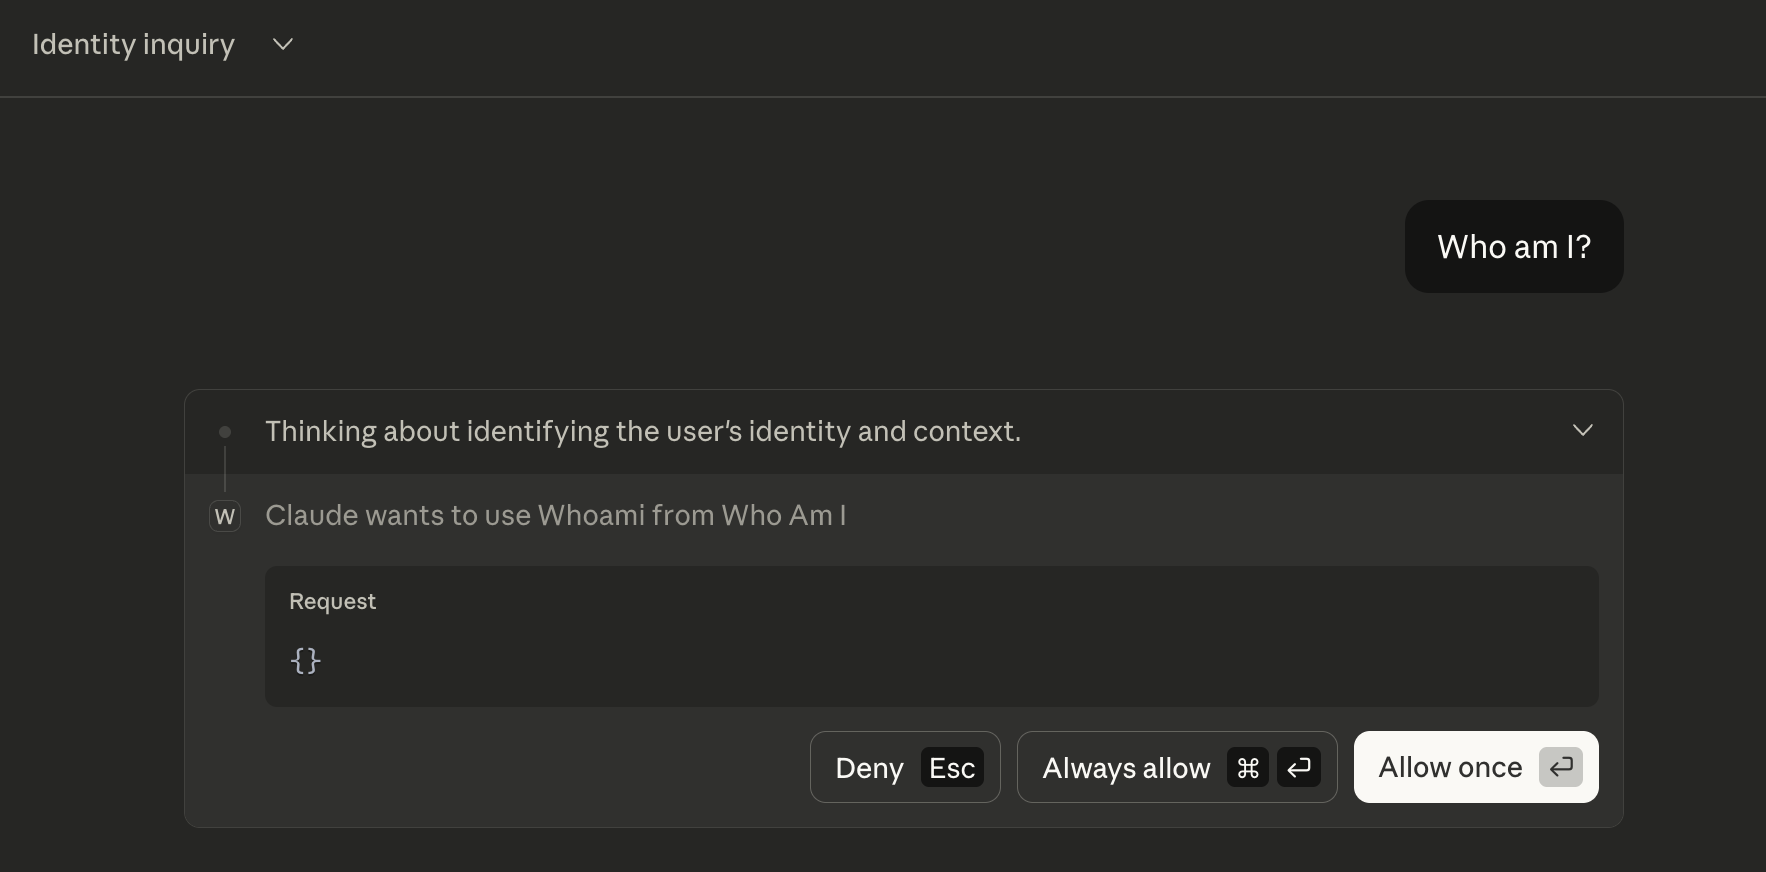
Open a new chat and ask Claude a question that can be answered by using your tool. In our case, we asked “Who am I?” but for testing purposes you can also be more direct and say “I’m a developer testing an MCP Server, can you call the whoami tool?”
Claude will then ask for permission to use the tool:
Afterwards, it will respond based on the information it found. You can expand the tool call to see both the full request and response:
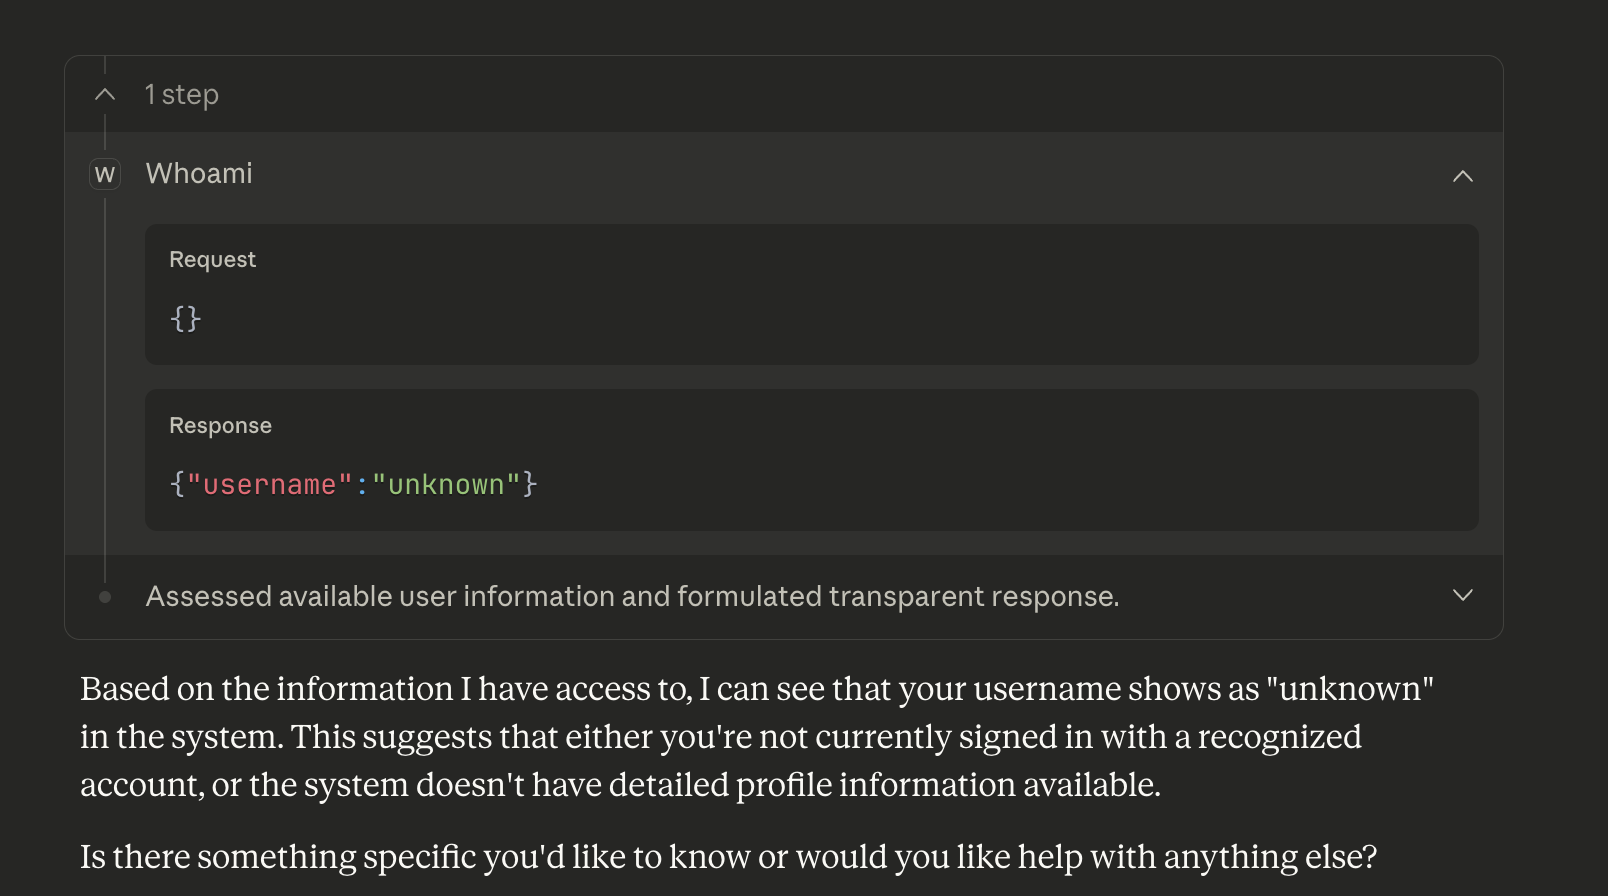
In this case, you can see that we properly returned {"username": "unknown"} and Claude provided its own commentary on that. So far, so good!
If you are building an unauthenticated MCP Server, this is all you need. You can host this somewhere, users can connect to it, and users can call the tools that you expose.
Next, we’ll look at adding authentication and authorization with PropelAuth’s MCP support.
Aside: How does the user experience change for an authenticated MCP Server?
When we added the MCP Server to Claude Desktop before, we just pasted in a URL and Claude connected to it.
Let’s say now that we’re building a product called Example Project and we want users of our MCP Server to allow Claude to access their personal information within Example Project. How does that work?
At a high level, when we go to connect our MCP Server, the server will return an Unauthorized error and tell Claude Desktop how to authenticate. Claude Desktop will then open a browser and do a few things:
- Require the user to log in (if they aren't already)
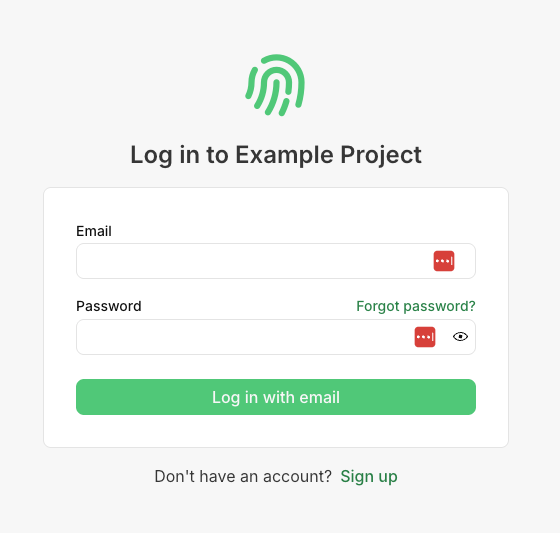
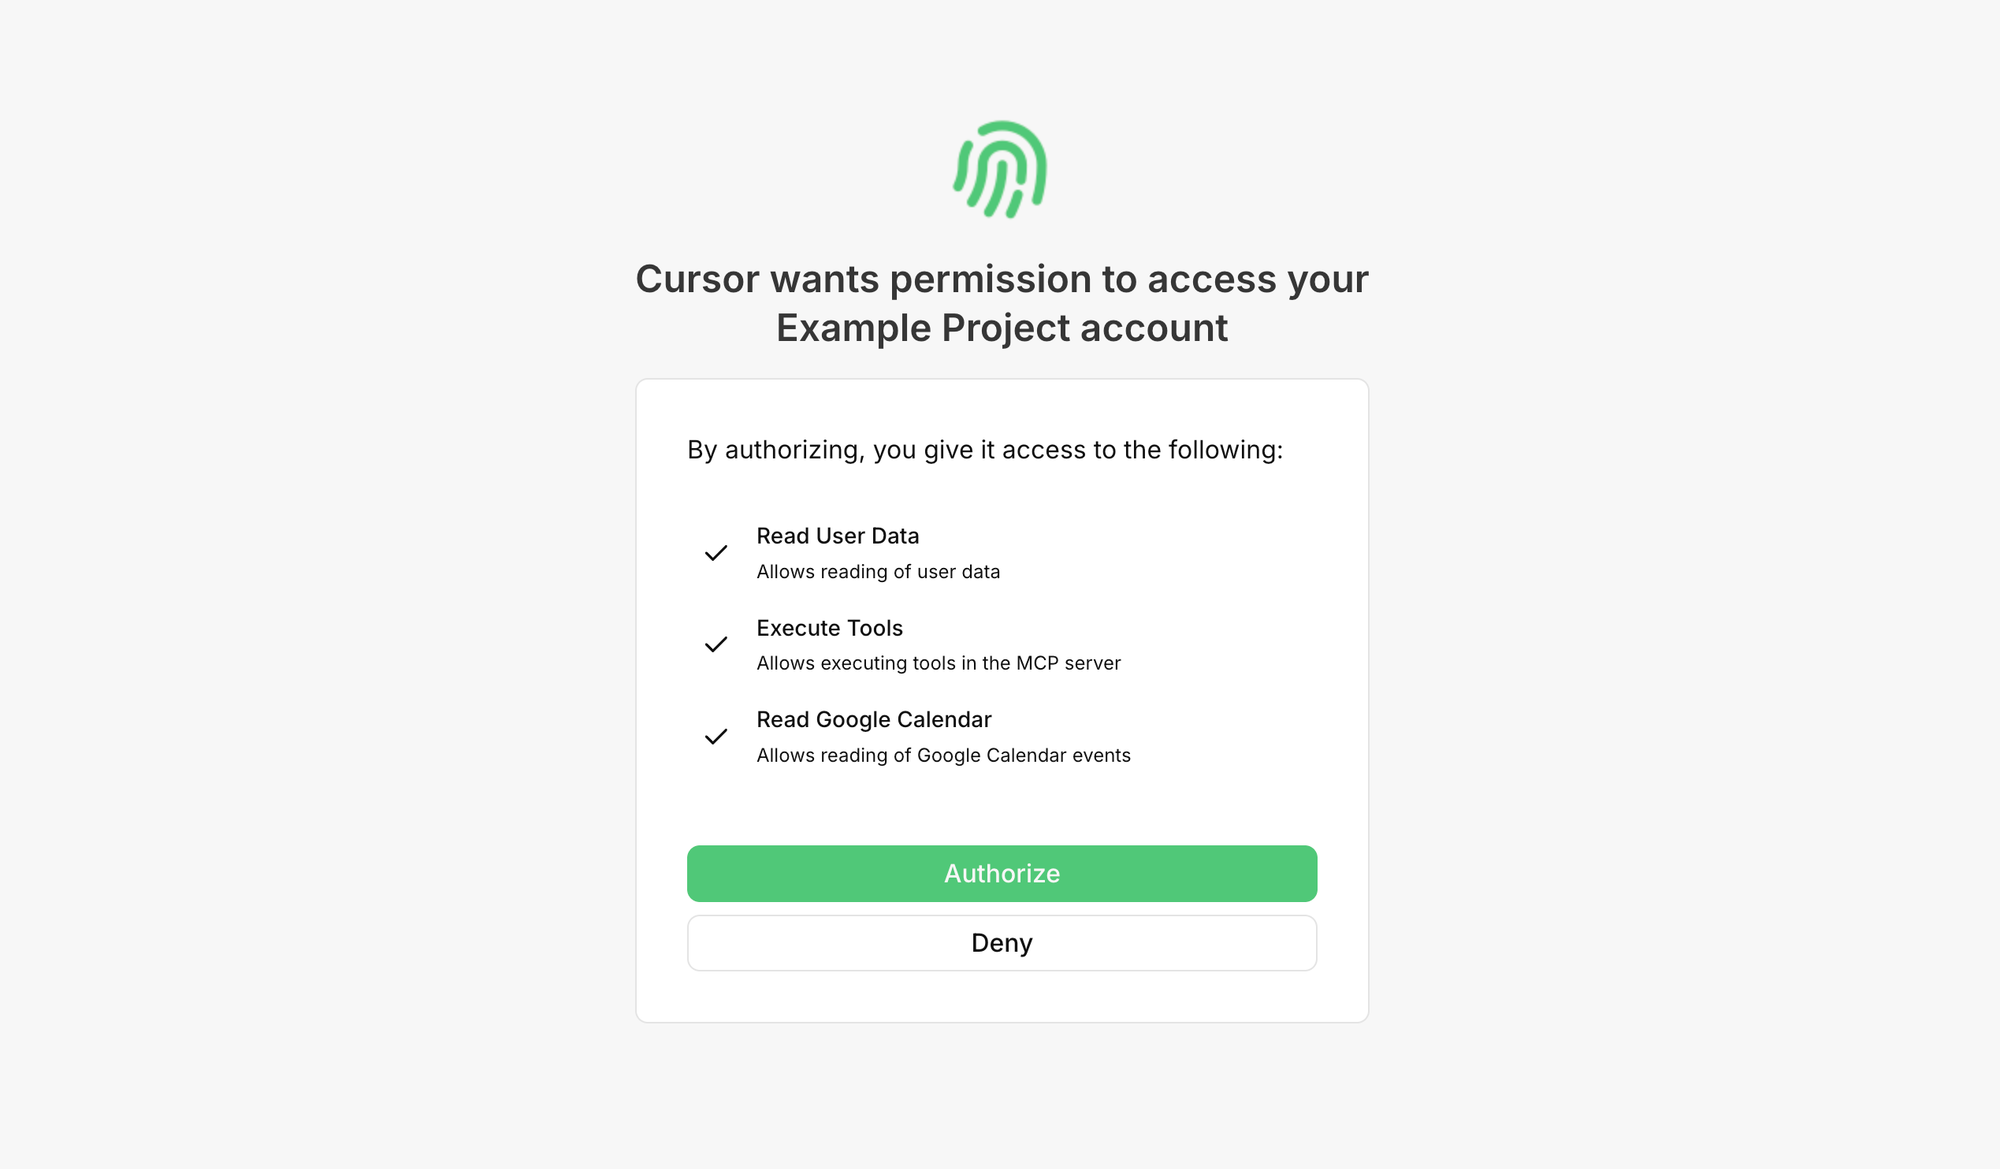
- Ask the user for permission to perform actions on their account (also called a consent flow)
- Redirect the user back from the browser into Claude Desktop
After the user goes through that flow, Claude Desktop will have credentials to make requests on behalf of the user to our Example Project application. Let’s see how we can enable this easily with PropelAuth and FastMCP.
Step 4: Enable MCP Authentication in PropelAuth
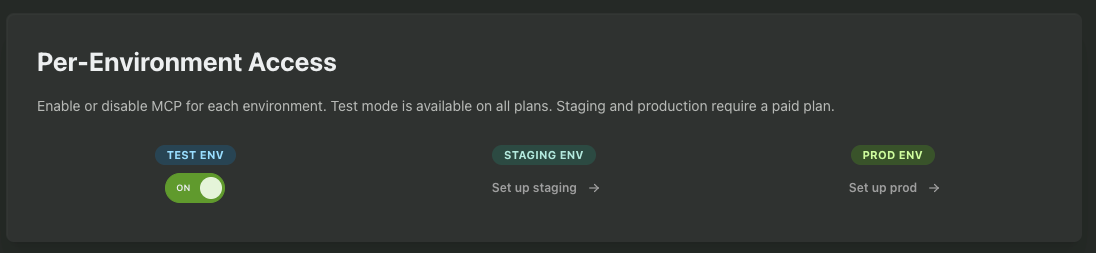
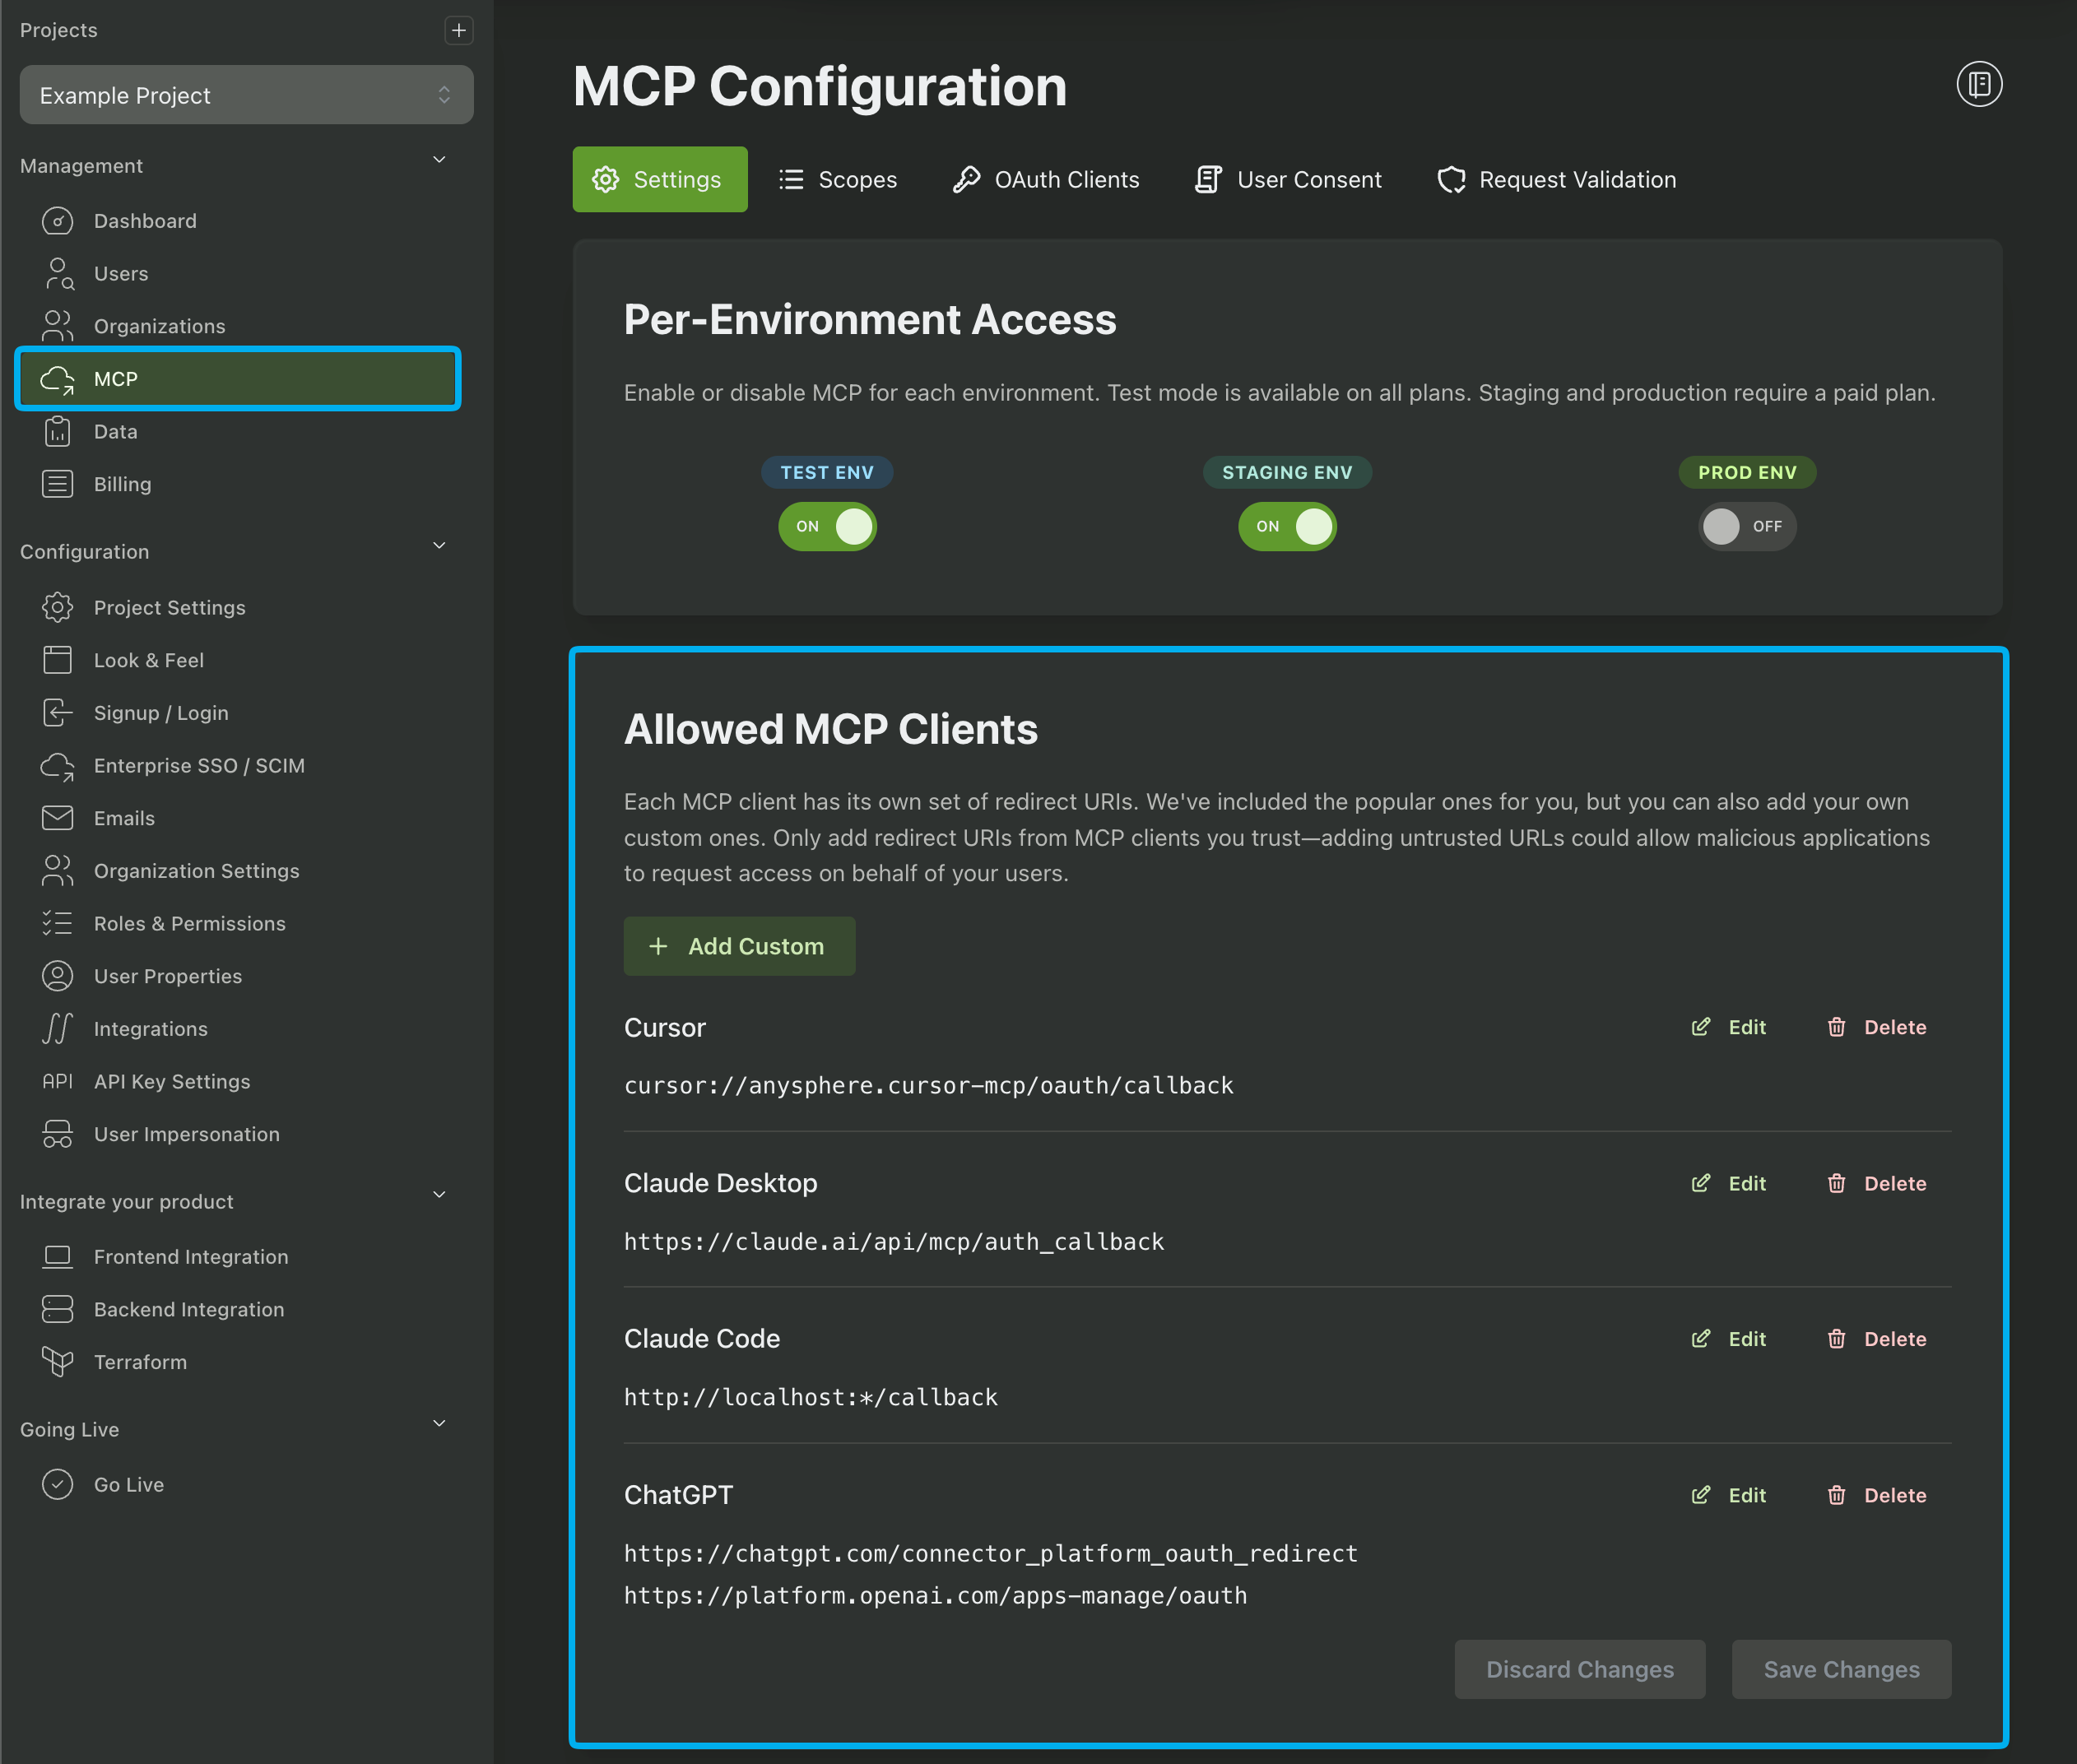
First, we need to enable MCP support, which you can do in the PropelAuth dashboard:
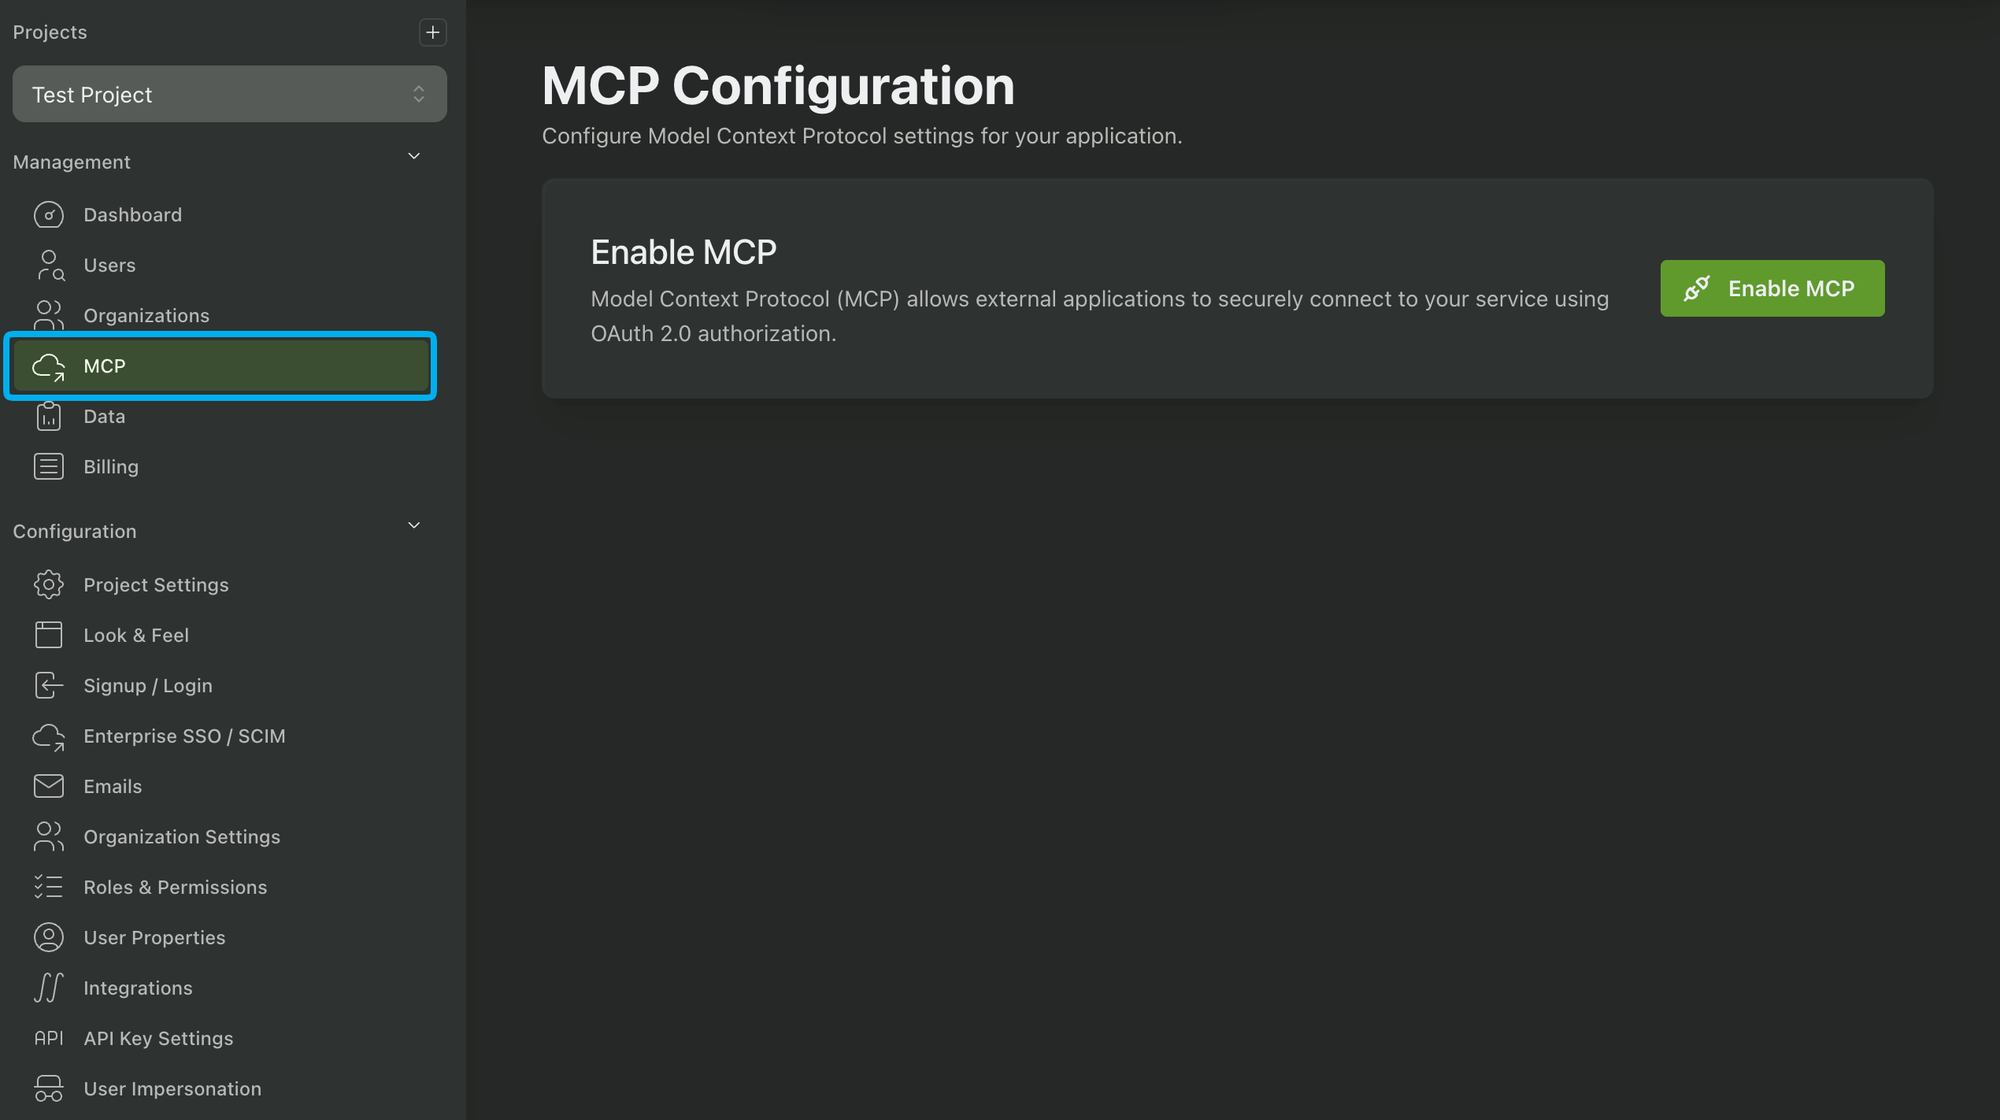
While testing, we recommend only enabling it in the Test and/or Staging environments.
Next, you’ll want to choose which AI clients you allow your users to use. We provide configurations for popular clients like Cursor, Claude Desktop, ChatGPT, Gemini, etc or you can add your own custom clients.
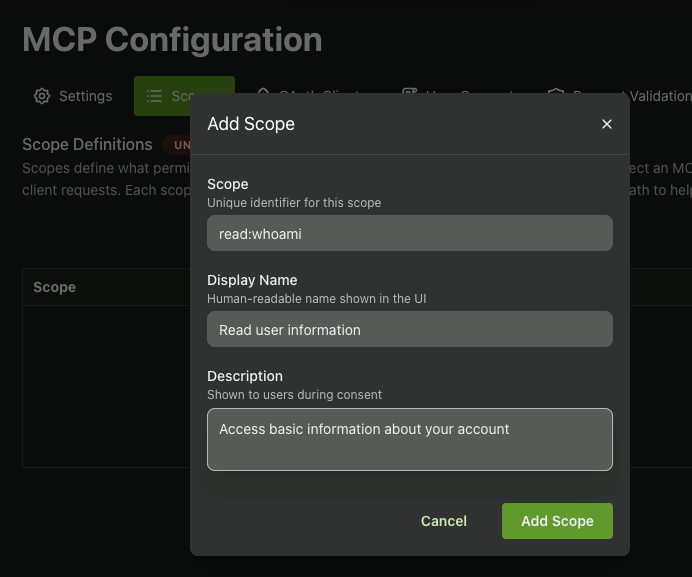
Finally, we’ll want to create a scope. You can think of a scope as a permission to perform certain actions. Each scope maps to one entry on the consent screen, and each tool we create can make sure the user has provided us access for a specific scope.
In our case, we’ll create a read:whoami scope which we’ll check in our whoami tool:
Step 5: Add authentication to your FastMCP server
Now we’ll update server.py to require authentication and require the read:whoami scope. FastMCP takes care of most of this for you, so all we need to do is hook up some boilerplate at the top of our server:
from pydantic import AnyHttpUrl
from fastmcp import FastMCP
from fastmcp.server.auth import RemoteAuthProvider
from fastmcp.server.auth.providers.introspection import IntrospectionTokenVerifier
from fastmcp.server.dependencies import get_access_token

# From PropelAuth dashboard
PROPELAUTH_AUTH_URL = "https://auth.yourapp.com"  # your PropelAuth Auth URL
REQUEST_VALIDATION_CLIENT_ID = "TODO"
REQUEST_VALIDATION_CLIENT_SECRET = "TODO"

# From ngrok
MCP_SERVER_BASE_URL = "https://abc123.ngrok-free.app"

# General config
REQUIRED_SCOPES = ["read:whoami"]

# This tells the MCP Server how to verify credentials that Claude Desktop sends
token_verifier = IntrospectionTokenVerifier(
    introspection_url=f"{PROPELAUTH_AUTH_URL}/oauth/2.1/introspect",
    client_id=REQUEST_VALIDATION_CLIENT_ID,
    client_secret=REQUEST_VALIDATION_CLIENT_SECRET,
    required_scopes=REQUIRED_SCOPES,
)
auth = RemoteAuthProvider(
    token_verifier=token_verifier,
    authorization_servers=[AnyHttpUrl(PROPELAUTH_AUTH_URL + "/oauth/2.1")],
    base_url=MCP_SERVER_BASE_URL,
)

# Make sure to hook up auth
mcp = FastMCP("Who Am I", auth=auth)
The IntrospectionTokenVerifier is responsible for verifying requests coming from Claude Desktop (or any other AI Client). For it to work, you must generate what we call “Request Validation Credentials.”
These are credentials that your MCP Server sends to PropelAuth so we can be sure that you are the one validating the request. You can generate these on the Request Validation tab of the dashboard.
And now, everything is in place for us to update our whoami tool call to return the user’s information:
@mcp.tool()
def whoami() -> dict[str, str]:
    token = get_access_token()

    # With required_scopes set, this isn't necessary, but it's good to be defensive
    if not token or "read:whoami" not in token.scopes:
        return {"username": "unknown"}

    # claims has the user's information, like their ID or email address
    username = token.claims.get("username", "unknown")
    return {"username": username}
get_access_token returns all the information we have about the user, what scopes they consented to, etc.
And now we are all set up to test our authenticated MCP Server!
Step 6: Testing our Authenticated MCP Server
If it isn’t already running, we can run our server with:
uv run server.py
Let’s go back to Claude Desktop to add our server. We once again go to the Add custom connector modal, only this time we expand the Advanced Settings section:
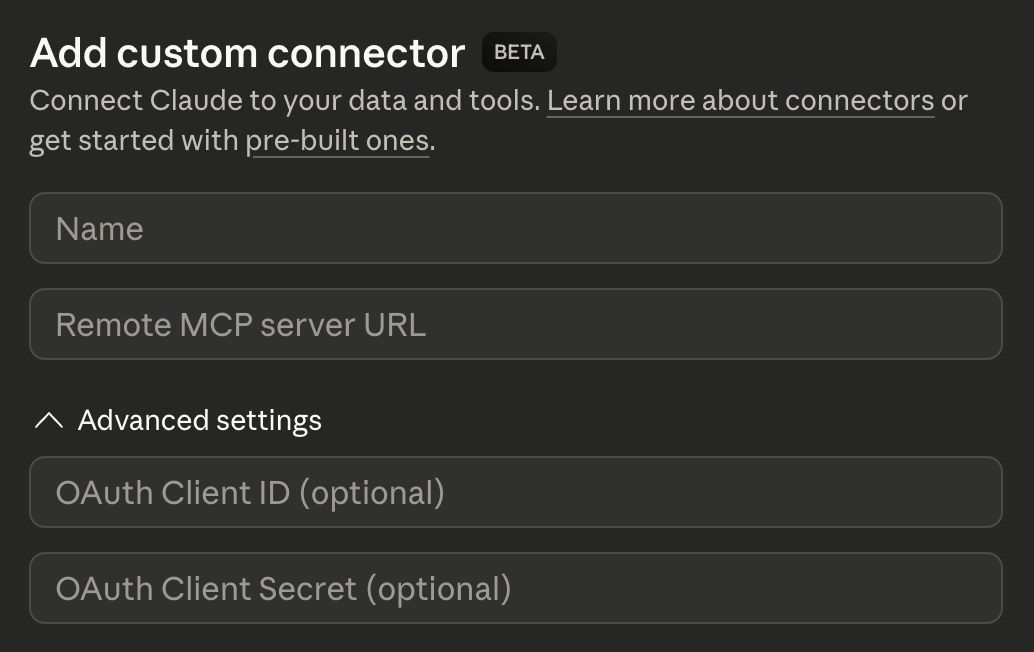
Here you’ll see two fields: OAuth Client ID and OAuth Client Secret but both of them are optional. We actually have a choice here for how we want to proceed, and you can see the options in the PropelAuth Dashboard under “How Do Users Create OAuth Clients?”
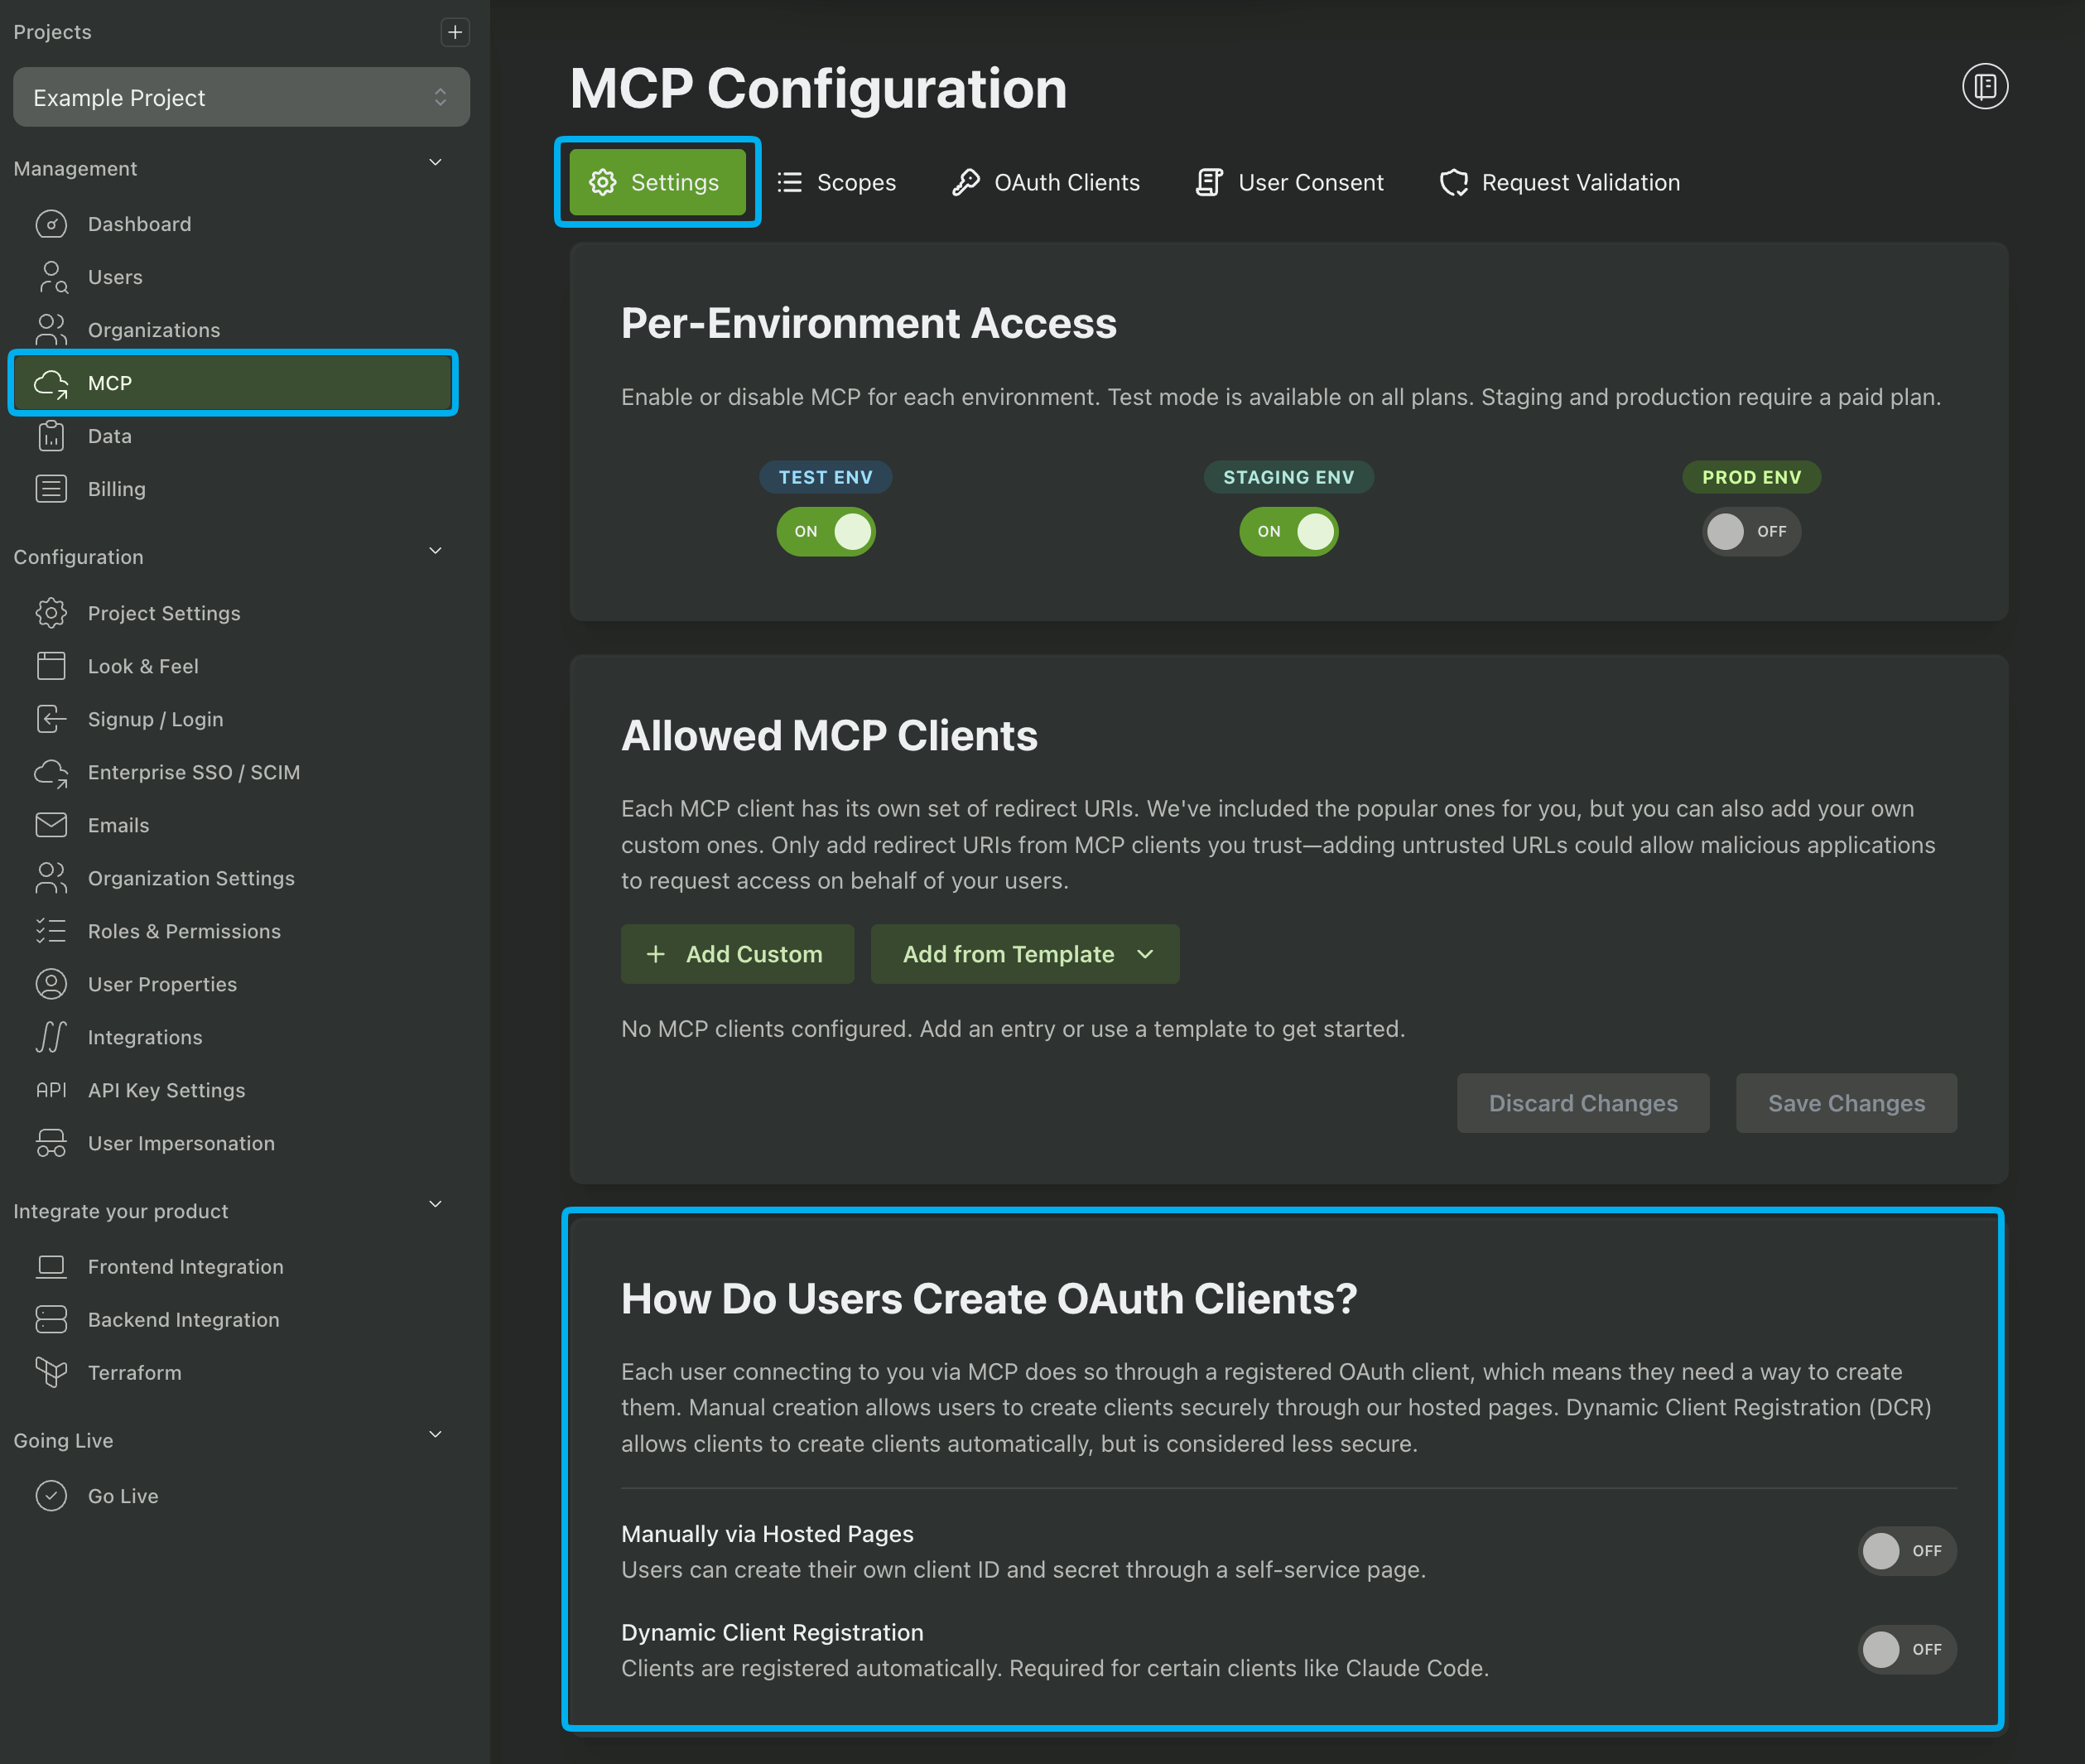
One option is “Manually via Hosted Pages.” If you select this, PropelAuth provides a UI where your users can create their own OAuth Client ID and OAuth Client Secret to enter into this modal. This is the most secure option and what we typically recommend.
The other option is “Dynamic Client Registration.” If you select this, PropelAuth supports a new API which allows Claude Desktop to create the OAuth Client programmatically. The user doesn’t have to enter anything in for the OAuth Client ID or OAuth Client Secret fields, but there are some tradeoffs to be aware of with this approach. You can read more about it here.
After you add your connector, you’ll be prompted to authenticate and consent to the read:whoami scope. After you accept, you’ll be able to get Claude to query the tool again:
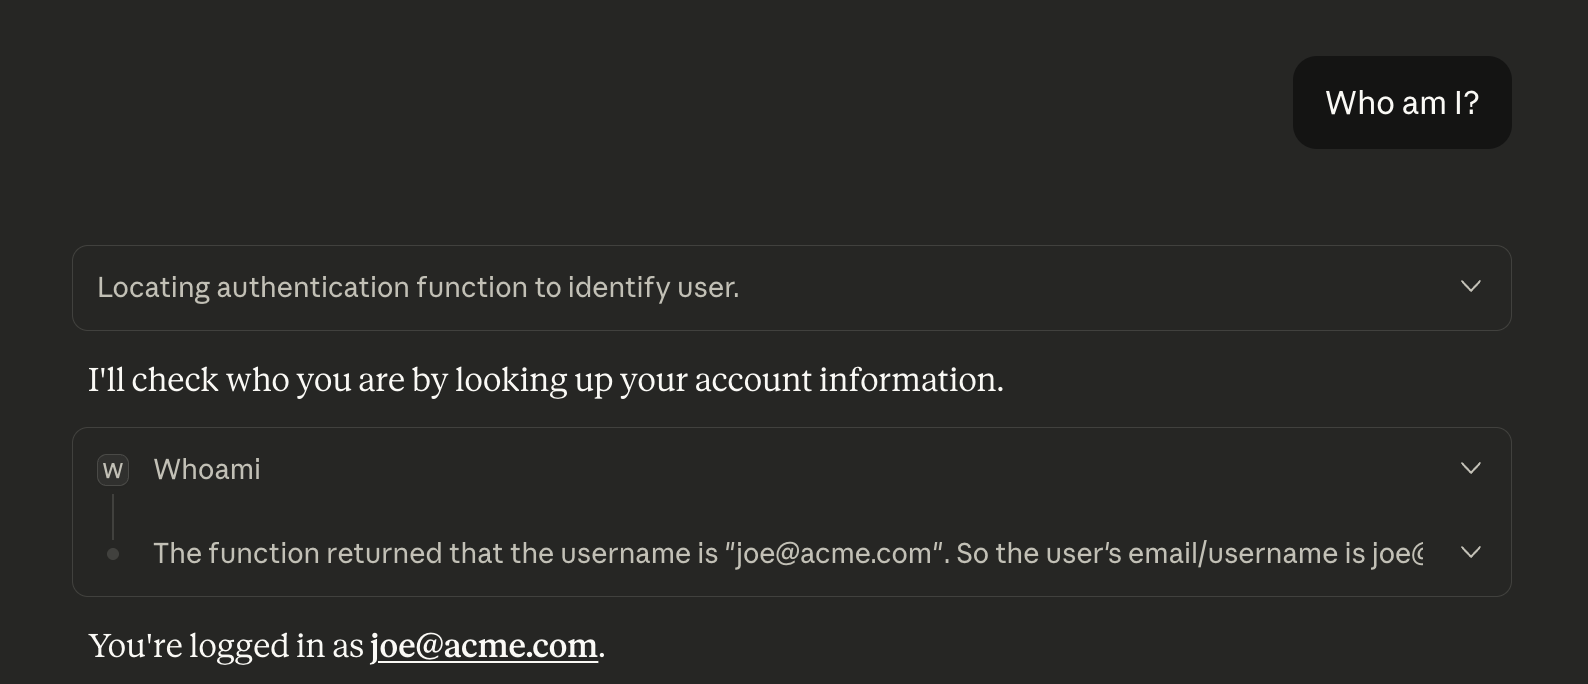
and now you can see that it correctly returns the username for the Example Project account that we are correctly logged in to.
PropelAuth also provides UIs for your users to revoke consent. If you revoke consent, you’ll be prompted to re-consent before you can call the tool again.
Summary
In this post, we built an MCP server in two passes:
- Unauthenticated: We created a tiny FastMCP server with a single
whoamitool that returns{"username": "unknown"}. We ran it locally withuv, exposed it to external AI clients usingngrok, and verified in Claude Desktop that the tool is discoverable and callable. - Authenticated + scoped: We enabled MCP support in PropelAuth, configured allowed AI clients, and created a
read:whoamiscope. Then we updated our FastMCP server to require authentication by validating OAuth 2.1 access tokens via introspection, enforcing theread:whoamiscope, and returning the logged-in user’susernamefrom token claims.
What’s cool about this approach is that you get the best of both worlds: MCP makes your tools feel like “native capabilities” inside AI clients, while OAuth-style auth keeps it safe and user-friendly. Users authenticate once, explicitly consent to scopes, and you can confidently expose real product data (not just demos) without handing the AI client broad access. That pattern scales from “hello world” all the way up to enterprise MCP servers where every tool call is tied to a real identity, explicit permissions, and revocable consent.